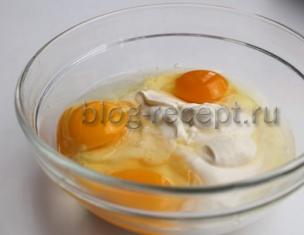
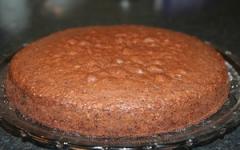
I think that if you have ever gone on multi-day hikes, then towards the end of the route you were visited by thoughts about food, about what would be the first thing you would eat when you get out into civilization. Typically, tourist cuisine, if it is a sports trip, does not shine with delights. And you don’t have the time and energy to prepare exotic dishes, all your energy goes into covering the planned route, and you dream of a restaurant. Why not diversify the tourist cuisine with pre-prepared dishes. I think everyone will be pleased to enjoy risotto with seafood, or solyanka, or maybe homemade noodles with chicken in the mountains. You will not find such delights in ready-made sublimates. But with a little imagination, a little effort, and gaining experience, you will more than recoup your efforts. Just imagine that after a tiring day of walking, all you want to do is stretch your legs in a sleeping bag, but not do any magic over the boiler. But you take a bag of dried beans and eggplant from your backpack, throw it into boiling water, and after 10 minutes you have a delicious dish on the table. When I started using homemade sublimates, my dreams about food somehow became less frequent during hikes, and my brain began to devote more time to enjoying the beauty that I saw around me. Since then, sublimates began to form the basis of an easy and tasty layout.
In addition to saving time on cooking, when organizing the layout on sublimates, you also significantly save gas, which also needs to be lugged around. In one of my articles, I already gave an example of how much less gas can be spent when using sublimates and radiator boilers, here is the calculation.
And ready-made freeze-dried meals can be stored for quite a long time. Even without using a vacuum sealer, storing finished products in ordinary plastic bags, I did not notice any deterioration in the taste of homemade sublimates after six months of storage.
In fact, it will be difficult to repeat the sublimation process at home. In order for the structure of the product after its restoration to be close to natural, and the taste to be natural, the sublimation process was invented. How does it happen on an industrial scale? The product is first subjected to deep freezing in order to preserve the original structure as much as possible, after which the whole thing is placed in a vacuum chamber, and as you understand, a deep vacuum is created. At low pressure, dehydrogenation occurs very quickly. But let’s leave the theory and try to do something similar at home, without the use of specialized industrial equipment. Let's agree that from now on I will refer to homemade products and, accordingly, the process as sublimates and the sublimation process.
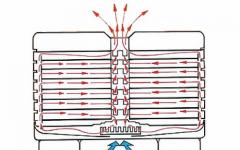
To dry food you will need a household dryer. They come in two types. A convection dryer is the most common and cheapest type of household dryer. They are sold in many household appliance stores and are relatively inexpensive; of course, there are some that are completely inexpensive. As a rule, they are not designed for large loads and have low heater power, which is unacceptable for preparing food for a hike. Try to choose a dryer with a maximum load (number of pallets) and a heating element power greater than 500 W. It is better not to buy dryers with solid trays, where the fan drives warm air straight up. Take a closer look at devices where convection will occur as shown in the following picture

In this case, if we completely fill the pan, the air will still continue to circulate. On solid pallets it is necessary to provide air passage, thereby reducing the effective loading.
The second type of drying cabinets are infrared dryers. They are much less common and are more often found in industrial versions. The cost of infrared dryers is 2-3 times more than that of convection dryers. But this is compensated by the drying speed, which is 2 times higher than that of a 700 W convection dryer, and by a larger load. The drying process in this type of device is similar to drying under the sun. Such dryers are produced, for example, by Radiozavod. In my opinion, sublimates dried using the infrared method are restored better and faster, although this may just be self-hypnosis.
My first dryer was a Supra convection dryer. After it broke and I got my money back for it, I purchased the infrared version of Summer Resident 4. Although the summer resident does not have a timer, and you need to monitor the drying modes yourself, this pays off with a much higher drying speed and almost twice the load. If you suddenly decide to use the Dachnik dryer, be careful, the temperature at maximum power is quite high, and you can burn the food.
I do not recommend using ovens for drying. The minimum temperature in most of them is too high to dry the food, and they simply burn, and the ovens are not designed to drain moisture, so you have to keep the door open. You'll just get tired of it, waste a lot of food, and waste time.
In order to dry soups and main courses, you will need sheets for preparing marshmallows. If your dryer is equipped with these, then great, but if not, then baking paper is quite suitable. It is desirable that the paper has a good non-stick coating, otherwise the finished product will stick to the sheet and it will be difficult to separate it from the paper. Depending on the design of the dryer, the sheets will have to be cut differently, it is necessary to ensure normal air circulation inside the dryer, do not be greedy, try not to completely cover the tray with the sheet, give room for air to pass along the edges, otherwise the hot air simply will not reach the upper trays.
I also warn against filling the dryer trays too tightly. In this case, the products turn sour before they have time to dry, since the temperature inside the volume of the dried products is favorable for the development of bacteria, and the drying time increases. In this case, you will smell sour. So don't be greedy. It's better to spend a little more time than to throw away a bunch of food and waste your time.
When you fill your dryer completely with food, even if you followed the recommendations above, the food on different trays will dry at different rates and you will need to swap them around.
For each dryer it is necessary to select the optimal drying process. Therefore, for the first time, it is better not to prepare any delicacies, but to experiment with something cheap and easy to prepare, so that you don’t feel sorry for throwing away the product if something happens.
The basic principle of making fast-recovering freeze-dried food is that it needs to be completely cooked before it goes into the dryer. Some things we are familiar with are prepared slightly differently. For example, soups are not boiled, but stewed, and before drying they do not look like soup at all.
Not all products recover well when we pour boiling water over them; if you prepare the products incorrectly, they will be hard and will not absorb enough water when brewing. And such dishes will also have to be cooked for complete restoration, but our goal is to make something like sublimates. Let's take it in order.
Meat
To prepare any homemade freeze-dried dish containing any meat, it is necessary to pre-process it so that in the finished dish, after restoration, it is not tough. In fact, you won’t get the usual pieces of meat in homemade sublimates; it will be more like meat powder. But where to go? I’m not a vegetarian and I don’t plan to give up such a valuable product during intense physical activity.Dried foods should contain a minimum amount of fat. The fat begins to taste bitter and give off an unpleasant odor. Therefore, meat should be with the least amount of it. I prefer to use chicken and beef for cooking.
To prepare meat for freeze-dried food, you will need a meat grinder. I use a regular mechanical one
 The cost of such meat grinders is 5-10 times lower than electric ones, and I use them extremely rarely, so the manual version suits me quite well.
The meat must first be prepared: boiled (and use the broth for further cooking), baked, or at least steamed, since most often I use chicken, and I feel sorry for time, I cut it into thin slices, about 5 mm thick, and fry it dry frying pan, fry this thing for 2-3 minutes on each side. It is not necessary to bring it completely to readiness, the main thing is that the meat will become tough, and when scrolled through a meat grinder it will turn into a relatively fine mass. Even if you use ready-made minced meat, after frying it still needs to be twisted, otherwise the meat in the finished dish will not be restored. The exception is chicken, which can be cut into small pieces after heat treatment so that the structure of the meat can be felt in the finished dish.
Thus cooked meat is added to both the first and second courses, and already with the dish it is subjected to final heat treatment.
You can fry finely chopped onions and grated carrots in a small amount of oil, mix the frying with the cooked meat, and dry it in this form. This product is used instead of stew and can even be added to ready-made dishes to increase their calorie content. When preparing the layout, I take about 25-30 g of roasted meat for one serving.
Cereals
Almost all cereals recover well after sublimation. But during cooking, it is better to boil the legumes more strongly than you do for regular cooking, this way they will then absorb water much easier.Vegetables
It is advisable to chop hard vegetables, such as onions and carrots, finely, and I generally grate the latter. When frying, finely chopped foods require less oil, and, as I wrote above, cooking oil should be used as little as possible.I’m generally too lazy to put potatoes in soups. After restoration, it turns out not so tasty. That’s why I most often use ready-made dry mashed potatoes, which I add at the very end of cooking, thus it also serves as a thickener for our semi-finished product. And for the dryer, the thicker the product, the better - nothing leaks anywhere and does not stain our dryer.
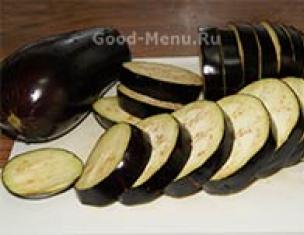
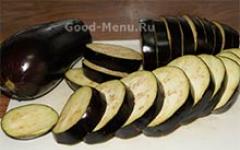
Zucchini and eggplants do not need to be chopped. They look even more attractive in large pieces in the finished dish when everything else is chopped as much as possible.
Canned food
Sometimes I didn't have enough time to do all this cooking before going on a hike. As one of the dishes, I bought ready-made canned eggplants in adjika and canned beans, mixed them all in a one-to-one ratio and dried them. It turned out very tasty, although not as economical, but certainly cheaper than store-bought sublimates.In addition to such canned food, olives and olives are periodically used in various soups; in addition to them, I also add capers to hodgepodge and pickled cucumbers to rassolnik. I also often use seafood, all kinds of green peas, and corn. All kinds of sauces are a good addition to many dishes. Just don’t put a lot of tomato sauces, they can spoil the future sublimate.
Purchased sublimates
Of the companies that sell sublimates at more or less reasonable prices, I can recommend Supplies and food. Freeze-dried meat - step-by-step recipePreviously, like all tourists, I carried and stored cans of stew, large, filling and high-calorie, of course, the weight and volume, and then the disposal of the container was a little upsetting, but when you are young and full of strength, these are little things...
Then, growing up and in times of crisis, I learned to make stew on my own and pack it in cardboard boxes (for juices) - more economical, more convenient and easier...
But time passes, laziness and the desire for greater comfort increases, pushing for new research and paths that lead to sublimation...
Of course, they dried it in the good old days, from breadcrumbs and herbs to onions and potatoes with carrots (dry milk and powdered eggs were freely available back then))), but somehow they didn’t get around to meat (although bouillon cubes were already available back then) ))), we made do with dry-cured sausage as much as possible...
But since dry-cured sausage, balyk and basturma are not a budget food for a simple tourist, I had to conduct experiments on my own...
To begin with, let’s take as a starting point that dried meat is prepared less expensively and does not require special skills and equipment,
it is more useful (since heat treatment destroys many chemical compounds - ask any raw foodist))) and is better absorbed (like any protein without heat treatment!),
it can be consumed “live” (without additional processing), it can be added to porridges and soups (though a little earlier than stew)),
it is lighter and does not require special packaging, and therefore additional weight on the container and its subsequent disposal (so as not to drag it home),
Well, you can carry it right in your pocket (although it runs out quickly)))
Table of caloric content and digestibility of basic food products: http://site/s122918/tablica_raschet..
Home cooking experience.
Everyone has their own preferences for meat (personally, I like pork and it’s fattier))), but of all the varieties we’ve tried, the most optimal is chicken, in particular breast meat.
-She does not need housing;
-It is lean (fats during drying and long-term storage give an unpleasant odor and taste bitter!);
-Since the fibers are thinner and more delicate, it is cut thinner (across the fibers);
-It dries faster than other types of meat;
-It is more tender in its dry form (you don’t have to chew)));
-It is easier to digest and faster to prepare;
-It is inexpensive and it is not necessary to purchase it in kilograms (you can prepare it gradually, without compromising your budget);
So, to prepare freeze-dried meat, we need:
TOOLS and EQUIPMENT:
-A sharp knife (for cutting meat across the grain);
-Large needle with stiff/nylon thread (for stringing and hanging);
-Container (for marinating and kneading);
-Dryer, oven, balcony (depending on capabilities, - everything is clear with the dryer, the oven is used in a slightly open state at the lowest speed, and the balcony, - just like when drying fish...);
DESIRE: +
AVAILABILITY OF MEAT: (any!)))
We take (preferably fresh) meat, remove (if necessary) from skin, veins, fat, bones and insects), cut across the grain (the thinner the better!), add according to the calculation
for 1 kg of meat:
-2st. spoons of salt (one heaped, and in no case iodized!);
-1h. spoon of sugar;
-1h. a spoonful of ground black pepper;
-1h. a spoonful of ground coriander;
-1h. a spoonful of crushed garlic;
-1h. spoon (in proportion to taste - paprika, hot pepper, cumin, allspice)
Mix thoroughly in a deep container (juice will be released) and place under a press in a cool place (no higher than 5 degrees Celsius!), on:
Pork - 24 hours
Beef/horse -20 hours
Veal/lamb -16 hours
Chicken (poultry) - 12 hours
Fish - 10 hours
Afterwards, we drain the remaining “brine” and rinse it in water with the addition of vinegar (vinegar protects against flies and mold) and place it on a drying rack or in the oven (personally, I prefer the economical option - on a rope on the balcony, especially in summer, in winter you can also stove/heating radiator) - a little longer, but it’s more economical and it’s not hot in the summer!)
OF THE DISADVANTAGES:
- It ends quickly...
| Created 09 Sep 2015 | |||||||||
Freeze-dried meat is much lighter than usually stewed meat, which many people still take with them on hikes out of habit. And in the stew, if anyone doesn’t know, there is about 66% water, which is not at all necessary and even undesirable to carry with you. During long autonomous trips, when saving weight plays a big role, they try to save on everything they can. And today I would like to tell you how to cook homemade freeze-dried meat.
Making freeze-dried meat at home
If you are not aware, on an industrial scale, freeze-dried meat is cooked under vacuum, ridding it of all the water it contains. The end result is something like dry meat powder. This year we tried to buy it, 100 grams of meat costs about 300 rubles in Moscow, enough for one time.
But firstly, not everyone can afford it, tourists, poor people, and secondly, I personally didn’t like this powder, which was almost tasteless. But you can cook homemade freeze-dried meat yourself. You can cook freeze-dried meat from pork or beef, it’s not for everyone. I'll tell you about two options on how to do this.
Option 1 - “freeze-dried meat”
- Scroll the meat through a meat grinder or cut into small cubes about 1*1 cm.
- Cook until done with seasonings and salt to taste
- Place the resulting mass on a baking sheet and dry in the oven at a temperature of about 50-60 degrees. The cooking time for such freeze-dried meat is about 5 hours.
- Don't forget to stir so it doesn't burn.
- We pack the resulting product in any convenient container (more details below)
I haven’t cooked this kind of meat myself, but experimenters say that weight decreases by about 4 times. They also say that 5 kg. dried meat fits into a liter bottle.
To prepare such freeze-dried meat, I think, you need 300-400 grams of the original product per time for 6-8 people.
Option 2 - “freeze-fried meat”
We’ve been preparing freeze-dried meat this way for years now, so I’ll tell you in more detail with examples and numbers.
We need meat and lard in a ratio of about 2:1. We never calculated exactly per person per time, but the approximate consumption: 4 kg. meat, 2 kg. lard for 6-7 people for 2 weeks. You can figure out a different amount yourself.
- We take lard and grind it through a meat grinder or cut it into small pieces.
- Place in a frying pan and heat the fat. We will use it to pour our ready-made freeze-dried meat during cooking and for better preservation.
- We also cut the raw meat into small pieces, about 1*1*1 centimeter, and put them in a large saucepan.
- After the meat is all cut and placed in a pan, fill it with fat rendered from lard. The meat should be all covered with fat.
- Turn on low heat and start cooking the meat. Approximate cooking time is 4-5 hours.
- During this process, water will begin to evaporate from the meat and bubbles will appear. Moreover, at first the water will be cloudy, since it is a mixture of soda and fat, and gradually it will become more and more transparent, as all the water will evaporate. The bubbles will also be rare and large at first, but gradually there will be more and more of them, and the size of the bubbles will become smaller. Until you have a foam of small bubbles floating on the surface of the transparent melted fat.
- Do not forget to stir the future ready-made freeze-dried meat so that the pieces do not stick together, especially at the very beginning of cooking, and so that the meat does not stick out on the surface. Well, we make sure that nothing burns.
- After the freeze-dried meat is ready, place it in a suitable container. The main thing is to do this right away, before the meat and lard harden. Place the finished product in the refrigerator to allow the meat to cool, or on the windowsill.
The weight reduction is the same as in the first option - somewhere four times. From 4 kg. meat and 2 kg. We got about 1.5 liter juice boxes of lard.
Containers for ready-made homemade freeze-dried meat
There are two options here:
- Small bottles with a dose of meat for 1 time. It’s convenient because you take out such a bottle for dinner or breakfast, cut it open, take out the meat and don’t think about anything else. Disadvantages: usually small bottles have a narrow neck - it is inconvenient to pack freeze-dried meat.
- One large bottle or box for your entire meat supply. It is convenient, therefore, because the meat is placed into the wide neck of such a bottle or box with a regular spoon. Disadvantage: you have to eyeball the meat into portions. But on hard days you can give out a large portion of meat, saving on free days.
Actually, how to pack freeze-dried meat:
The easiest option is juice boxes. But they will have to be wrapped in several bags and sealed with tape, since it will not be possible to seal them hermetically. But in the heat, lard melts, and there is little pleasure in spilling this fat into a backpack and getting an appetizing-smelling sleeping bag, which is impossible to wash on a hike.
For small disposable bottles for meat, you can take 150-200 gram yogurt bottles with a screw cap. The same bottles, but large and with a wide lid, can be taken for the entire supply of meat. I came across very convenient plastic jars with Nesquik lids.
Storing freeze-dried meat
Such meat, boiled in fat, is stored for a very long time at any temperature. I read about an experiment - a box of prepared meat was placed on a working battery for a month. Afterwards, no changes in taste or smell were noticed. We took it camping for two weeks and didn’t experience any problems either.
Eating freeze-dried meat
Dried freeze-dried meat is poured with boiling water for about ten minutes, then poured into a pot with porridge or pasta. We simply added the fried stuff directly to the porridge. The point is that you need to give the meat time to soak up the water it was deprived of.
And yes, about the taste. I love the meat prepared according to the second option, because it tastes like regular fried meat, and not like an incomprehensible powder, as in the first case or as in the store-bought version.
If anyone doesn't know, then
Or, to put it in military terms - IRP No. 2. Some particularly fanatical comrades manage to purchase it on an industrial scale. Everything would be fine, but for 10 days such a diet will weigh 21 (!!!) kg. When you drive a car, weight is not critical. But when you carry all your equipment and food on a bicycle or on your back, such performance characteristics are unacceptable. There are many alternatives to army rations, but today we will talk about freeze-dried products.
Options, Kowalski.
Most products spoil very quickly. This is due to processes occurring in dead cells. We will not go into biochemistry. And if on the fingers, then the processes of decay are associated with the activity of bacteria, which require suitable temperature, humidity and the presence of oxygen. There are several simple ways to extend the life of your products:
- Freezing
- Drying
- Preservation (pasteurization)
Freezing disappears immediately - no one will carry a generator and refrigerator with them in their backpack.
Drying has both advantages and disadvantages. Dried foods weigh little, take up little space, and are relatively easy to prepare. But there are also a number of disadvantages. During subsequent cooking they will not regain their original properties. A typical example is dried fruits. Compote made from dried apples is different from compote made from fresh ones. The biggest problem with meat is that no matter how much you cook dried meat, it will still be tough. Although the broth turns out normal. In addition, dried products are not commercially available; they need to be prepared ahead of time.
Conservation. The meaning of preservation is that products are processed at a temperature of 100 degrees and packaged in sterile packaging at the same high temperature. During the canning process, most of the bacteria are killed, but the spores remain, so opened canned food is not stored for a long time. Today in stores there is a sea of various ready-made canned goods for every taste and budget. They require little storage and are ready to eat straight from the package. The main disadvantage of ready-made canned food is packaging. Carrying extra kilos of tin or glass is also not the best solution to the problem. Although in large groups in populated areas, where products are purchased for a maximum of 3-4 days, this is a completely viable solution.
One of the successful options for preservation is cooking meat using the Lebedev-Shenderovsky method. The peculiarity of this method is that the stew is cooked not in water, but in fat or lard for 6-8 hours. Cooking occurs at a temperature of 105-110 degrees (and not at 100, as in water), and much more microbes are killed. And in 6-8 hours, fat completely displaces water, leaving virtually no chance for bacteria to reproduce.
Meat prepared in this way can be immediately packaged in daily portions in foil or milk tetra packs, and it will easily survive the entire trip. I prepared meat in a similar way for a hike around Kenozerie, and I’m pleased with the result. The result is a very tasty stew, which is good both in a cauldron and on a piece of bread, much better than sausage. One minus - the cooking process is very greasy, and the kitchen is busy all day.
Sublimation theory
When many people hear the word freeze-dried food, freeze-dried coffee comes to mind. And the thought that ours with a pig’s snout is not in the sublimation range. And they will be wrong.
But in essence, what is sublimation? The physics textbook says that sublimation is the transition from the solid phase to the gaseous phase, bypassing the liquid phase. And if on the fingers, then the evaporation of ice without the formation of liquid. A similar process can be observed during the evaporation of “dry ice” - frozen carbon dioxide. It is called dry because it evaporates at room temperature without forming a liquid.

But how does this apply to produce and prepared meals? And it's very simple. The product or finished dish is frozen, and then water is sublimated at a certain temperature in a deep vacuum. The use of a vacuum allows you to get rid of water without using high temperatures, and therefore without destroying useful substances. Also, in a vacuum, all bacteria and spores that can cause rotting die, and we get a completely sterile product. And if it is packaged in vacuum packaging, or in packaging with an inert gas (for example, nitrogen), such a product can be stored for a very long time.
But every coin has a downside. Freeze-dried products did not escape this fate. The need for vacuum chambers and special packaging, as well as the high energy intensity of the process, make the final product not the cheapest. Well, after all, miracles do not happen and the taste properties of ready-made dishes change. Sometimes very much.
Practice of use.
During the Kamchatka campaign, 3 week-long trips were planned in complete autonomy. The situation was complicated by the lack of drinking water on part of the route - we had to take water with us and use it extremely sparingly. In this situation, the most reasonable solution was to use Gala-Gala freeze-dried products from the Russian manufacturer Galaktika Inc. JSC.
They produce 3 types of products
- Ready meals
- Product ingredients
- Sets of ready meals

Ready meals. Ready-made meals are packaged in bags of 20-30 grams, depending on the recipe. Why so few? Do not forget that most of the weight in products is water, and there is no water in sublimates. In the Gala-Gala catalog, all dishes are divided into first, main and porridge. In fact, the division is conditional and I will simply list those that I tried.

Oatmeal. Oatmeal, it is also oatmeal in Africa. Intellectually, I understand that it is useful - fast hydrocarbons, which make it good for driving and other delights, but except when hiking, I can’t bring myself to eat it. And even then I try to take muesli with me when I go hiking. Gala-Gala makes several types of oatmeal - with lingonberries and apples, raspberries, blueberries, and currants. They don't differ much in taste. Essentially the same as “Clear Sun” No. 3, only with additives and the readiness is almost instant. For breakfast, that’s it, but I would buy it for every other day.
Omelettes. I don’t know how, but the omelette really tastes like an omelette. 100% edible. Made with mushrooms, butter, cheese and smoked meats. I didn't understand the mushroom omelette. Apparently they stuffed champignons in there instead of mushrooms. But somewhere with smoked meats it’s even a delicacy. Omelettes with butter and cheese can be flavored well, for example, with freeze-dried meat or liver, it will turn out tasty and satisfying. The main advantage of omelettes is that they require the least amount of water to cook. If you are planning low-water areas with a strict water saving regime, I recommend leaning on omelettes, and leaving cereals and soups for more favorable sections of the route. Between the Ambon stone and Apakhonchich, where we saved every drop, they helped us out a lot.
Soups. I'll tell you about the ones I got in the layout.
- Moscow Borscht and Ukrainian Borscht. When it comes to borscht, I recommend taking the Ukrainian one. Of all the soups, it is the most delicious. The Moscow one is somewhat fresh and sour, but the Ukrainian one is just right.
- Soup with porcini mushrooms. Edible. You can even taste the taste of porcini mushrooms if you don’t dilute them too much. I got it 2 times, so it’s hard to say anything about it.
- Chicken soup with rice. Chicken soup with rice, like a hot mug of Maggi. You can eat, but no more. By the way, this soup is great for recycling chicken rice. One packet of rice with chicken, one packet of soup per cup of water - it turns out edible. It is impossible to eat rice with chicken any other way. It’s good that there is only one bag left from the waterless area. Otherwise, the rice and chicken would have gone into the trash.
- Ukha "Volzhskaya" Suddenly it tastes like pea soup. Adding Darnitsky croutons is practically a delicacy. I like it.
- Hungarian goulash soup and kharcho soup. Edible, even nice with spices. You can also flavor it with a bag of rice for extra richness.
Buckwheat porridge "Gurievskaya" and with butter. You can't spoil buckwheat with oil. Edible. Sometimes it's even delicious. For breakfast, a great alternative to oatmeal that quickly becomes boring.
Buckwheat with all kinds of meat. All kinds of meat - beef, smoked meats, chicken. It just so happened that buckwheat with all sorts of things made up most of the main courses on this trip. Edible, tasty in places, but after 3 weeks, almost the buckwheat itself began to become boring. It needs to be diluted with something.
Rice with everything. I don’t know how, I don’t know why, but the rice turned out to be practically inedible. And this is not just my opinion. The whole group spat rice. More or less, it can only be eaten if mixed with soup. Kharcho or goulash soup, for example. Before you buy rice with anything, try it out. Maybe it’s us who are so picky, but if 8 people say it’s inedible, that’s a warning sign.
Wheat porridge with beef. My opinion is disgusting, the opinions of the rest of the group were divided 50/50. I recommend trying it before purchasing on a hike.
I didn’t get any potatoes at all, so I can’t say anything good or bad about them.
In addition to ready-made dishes, Gala-Gala offers food ingredients. Meat, dairy products, fish, greens. They can be used instead of stew, for example, or added to ready-made Gala-Gala dishes. Finished products are packaged in bags of 50, 100 and 200 grams. We took 100 gram bags.
I've seen reports online where freeze-dried meat is used as a substitute for stew. Option, but we used it as an addition to meals, usually for lunch or dinner. One 100 gram package was divided among four. Even the liver, which I literally don’t eat at all, tasted great when flavored with the omelette. From fruit and berry products we took a mixture from which we made compote. The consumption was approximately the same - one 100 gram packet for 4 people.
How much and what to take
The most important question is how much and what to take. Let me tell you right away that one serving package is not enough. At one time you need at least two, and maybe three - it all depends on your build and appetite.
I divided the purchased sublimates into daily rations. Moreover, there were 2 options for rations - regular and reinforced. The usual ration contained:
- 2 packages for breakfast. It was porridge or omelette.
- For lunch, 2 packages with the second and one package with soup. The soup was prepared in a cup, the second in a plate.
- For dinner 2 packages with a second

Since I was not the one doing the purchasing, I could not control the quantity of sublimates purchased. Therefore, after unfolding, there were unpaired bags with porridge and the second one. Then the decision to immediately divide into rations seemed reasonable, but practice has shown that the solution is not the most successful. The packages were held together with masking tape, so it was impossible to see what was in the solder. It was only possible to distinguish the reinforced ration from the regular one - they were packaged differently. As a result, for the first half of the hike I ate only oatmeal with rice, and for the second half of the hike, only buckwheat. It’s inconvenient, you’ll agree, and it gets boring. This is why I do not recommend taking ready-made rations - you can put together a more varied menu yourself. This year I will not complete the rations, but will simply pack the dishes.
Summary.
If we take Kamchatka separately with its insane prices in stores, then purchasing products locally will be almost more expensive than freeze-dried products. In more civilized areas like Baikal or Altai, yes. Freeze-dried foods can be more expensive, but their light weight and instant preparation are worth it.
Sublimates can also be used for high-speed, easy-to-use LDPE pumps - daily rations can easily fit into a jacket pocket. To take it or not to take it is up to you. I decided to take it.
Good luck on the roads.
On the topic of previous posts about food.
The problem of reducing the weight of meat products or various methods of preparing them for long-term storage is very relevant, especially for long autonomous hikes, where every gram literally weighs on your shoulders.
Previously, we bought freeze-dried meat in a vacuum drying laboratory in one of the Tomsk institutes, and in three versions:
- initially we brought meat that had already been boiled and ground in a meat grinder, i.e. ground meat
- the second time - they brought raw meat
- for the third time - we already bought ready-made beef sublimate;
We also tried to buy freeze-dried white chicken meat, but we didn’t like it at all, because during processing it lost its organoleptic qualities of meat, turning into something like lumps in cat litter - they absorb, have no taste or smell. :)
Here are three definitions (http://ru.wikipedia.org):
Sublimation(food industry) - a special technology for removing water from fresh products using a vacuum method.
Drying- removal of liquid (most often moisture-water, less often other liquids, for example, volatile organic solvents) from substances and materials by thermal methods.
Boiling (cooking)- one of the most common types of heat treatment. It consists in the fact that a product completely immersed in hot (boiling) water (or other liquid) is subjected to processing.
And let’s immediately make a reservation that this method only uses cooking and drying.
First: choosing the starting product
To prepare a dehydrated meat product, you should choose
high quality meat - without veins, films, tendons and fat.
In our case, we tried two semi-finished products: beef stroganoff and roasted beef. As an experimental mass, two packages of 500 grams were purchased. Both versions of the product were boiled, or rather baked, in the oven for an hour in its own juice in a special baking bag with the addition of a small amount of salt. The pieces were laid by hand to increase the spaces between them for better heat treatment. In the baking sleeve, 5 holes were made with a knife to allow steam to escape. Baking temperature 200 degrees before boiling, after which the temperature dropped to 150.
After baking, the pieces were removed from the sleeves and cooled in the open air.
After such cooking, a very tasty broth remains in the bags, which can be used for any other culinary purposes. The idea arose of spraying the cooked meat with it from a sprayer, but this is for future experiments.
Then each portion was ground in a meat grinder with a large-hole exit knife, forming lumps (similar to flakes). There is an option to manually split the meat into fibers, but this seriously increases the labor costs for producing the finished product.
The processed minced meat was dried in several stages in the same oven,
at a temperature of 100 degrees with the door open. On two baking sheets:
1. pour a layer covering the bottom of the baking sheet by 1 cm onto both baking sheets
2. one was placed on top of the oven,
the second was placed in the oven for 5 minutes, then mixed with a wooden spatula
and back into the oven for another 5 minutes.
3. Then the baking sheets were both mixed and swapped, repeating step 2.
4. steps 2 and 3 were applied twice, i.e. the total time for two baking sheets was 40 minutes.
Below are the weights of both types of meat at different stages of cooking:
raw product; ground meat; dry meat;
Beef Stroganoff: 970 gr; 550 gr; 253 gr;
Frying: 973 gr; 520 gr. ; 250 gr;
Taking into account the drying coefficient calculated experimentally (dries out 4 times), the price was calculated:
price per 1 kg of raw product; price per 1 kg of finished product (excluding labor and energy costs)
Beef Stroganoff: RUB 286.20; 1131 rub;
Roasted beef: 265 RUR; 1060 rub;
We will write about the practice of application and standards of use later.