Jam - the most popular. You can easily make jam from different berries (currants, raspberries, strawberries, cherries, lingonberries) and fruits (plums, apples, peaches, apricots and even oranges).
Berries can be both boiled and just ground with sugar, retaining their natural aroma and taste. Home preparations for the winter from fruit are only jam, that is, the fruits subjected to obligatory thermal processing (cooking or stewing).
Processing time depends on the size of the cans, height and type of products inside the can. Smaller banks and lower marks have shorter processing times than larger banks and higher marks. After the processing time, turn off the heat and allow the jars to sit in hot water for 5 minutes. This allows boiling hot water inside the can to settle and start the process of sealing the lid. After 5 minutes, remove the jars from the pot and let them cool at room temperature for 24 hours.
When the food is cooled, it shrinks, which creates a small vacuum form inside the can. The attraction of this vacuum opens the flexible metal lid inward, which indicates the tightness of the can, and oxygen can no longer pass. To check the seal, press the cap with a finger; The sealed lid will feel solid, while the unsealed lid will flex under pressure and make a small sound.
How to roll up the jam for the winter?
The first method is a sealed seam under the tin lids using a seamer. Household preparations can be kept in this form both in the cellar and at room temperature (but far from heat sources).
How to sterilize and roll banks:
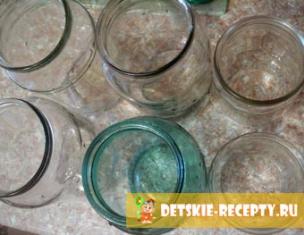
 1. Beforehand, all cans should be thoroughly washed with soda inside and out.
It’s about the time of the year when figures in the canning style start to appear in the newspapers, and everyone starts thinking about getting on a guarded train, but they never do that. It sounds a lot harder when you enter it for internet readers, but the actual process is painless.
Perfect for impressive friends or making your mom dizzy with excitement. 
Main canning equipment: - banner with a water bath with a can stand. If you cannot find a “banner with a water bath,” you can use a large spare pot and get your hands on the canning rack. This is the one that I have. - cans. Make sure they are safe for canning with a water bath. You can buy them either in a “regular mouth” or in a “wide mouth” - in general, jam and jelly are meant for regular mouth jars, and sauces, pickles and larger products are better suited for wide jars. - Canned lids.
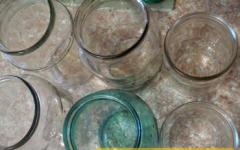
 2. The next stage is can sterilization. Previously, the hostesses sterilized the jars, putting them on the tip of the boiling kettle, and now the process is much faster - the banks are sterilized in the oven on the rack (not on the baking tray) at a temperature of one hundred degrees.
These are metal circles that go up the throat. Always buy fresh caps every time you can! - Canning rings or ribbons. These are metal strips that are stacked on the lid and in the jar. They can be reused from previous assignments. - Wooden or plastic spatula. This is to get air bubbles from your can before processing. - Plastic bucket. For bucket. - Lots and lots of paper towels.
Jamming is a dirty, sticky business. 
Additionally - food scale. Most canning recipes are by weight, and this makes it easier for your recipe to comply with canning instructions. - Lift. A large plastic funnel that facilitates the digestion of your food in your jars. - Magnetic wand. This is just a small stick with a magnet at the end of it.
 3. Tin lids must be boiled in a saucepan under a lid for 5 minutes.
 4. When the jars are dried in the oven, they are filled with hot jam on the very neck.
This makes it easier for you to get the can lid out of hot water. There are two different types of canning: canning water baths and canning pressure. Bathtub bath is easiest to do, so we will use it here. Remember this canning for lazy people? Canning with a water bath is safe for products with high acidity. Basically, you can use a bath for baths with most fruits and vegetables that have been introduced into a highly acidic solution. You cannot swim in water without vegetables, meat or fish.
 5. Then cover with a lid and roll a special machine for seaming. It is important to choose the right sealer.
 6. Rolled banks check for tight fit of the lid (so that it does not move, it spun) and turn the lid down, heat it wrapped. Leave the rolled up banks cool (approximately at night).
Some of you may be concerned that canning is unsafe. Now, just because this manual of a lazy person does not mean that we are not able to understand correctly. Just the right canning is really that easy, even a lazy person can do it. It is much easier than making a cake or something like that.
There are three important pieces of canned food that you want to perform to make sure your food is safe to eat. First, you want your cans to be sealed correctly. The jar is sealed when the rubber part under the lid of the jar is heated in the process of the water bath, and then forced to cool quickly when removed from the jar and leave it in place. Intense heat plus the cooling process creates a vacuum seal with a lid.
The second method is capping with copronic covers.
Jam harvested in this way is stored only in the refrigerator or in a very cold cellar.
 1. The barks are sterilized as in the first method, and the capron caps are immersed in boiling water and immediately turn off the fire.
Another part of ensuring safe canning is to make sure that your food reaches the correct internal temperature inside the can. You also want to have enough water over your jars inside your canner. This ensures that the inside of your cans will contain hot water circulating around them so that they can cook properly. Make sure you wash and sterilize the jars before using them to do something. Make sure that you keep the discs of your cans clean and always use fresh covers.
 2. Jam is poured into a jar 2 cm below the neck and covered with a 1.5 cm layer of sugar.
 3. Tightly close the nylon covers and put in the refrigerator for storage for the winter.
Always use fresh, flawless food for canning. And never, never use old decorative cans or cans of items you previously bought for canning. Older jars often have cracks, and jars from store-bought goods may not be suitable canning jars, even if they look like this.
Pectin is a supplement that you have to add to many fruit jams to get this crazy, jelly feel. Since blueberries naturally have a lot of pectin, they don’t need extra stuff, so you need to buy even less. In addition, blueberries are now in season, so they are also quite cheap. What you need for blueberry jam: - 3 pounds of fresh blueberries - 6 cups of sugar - ¾ cup of water. Yield: 6 to 8 ounces. Jars with half a pint.
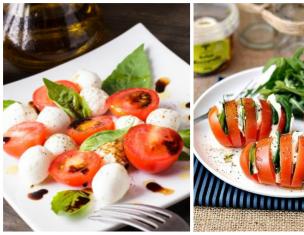
Supermarkets offer a huge selection of preservation for every taste: from banal pickled cucumbers to exotic fruit jams. And before our grandmothers and even mothers cooked and harvested jam for the winter on their own. You open a pantry - and there are glass jars on the shelves, through the transparent sides of which you can seductively see the seedless cherries, strawberries, halves of pears and apricots. We offer to talk about banks today. How to choose them correctly and prepare them for preservation so that delicious homemade preserves stand in them before winter and the taste of fruits reminds of summer.
Optional equipment: - 6 half-pint cans - 6 fresh caps - 6 cans of jars - jelly pot or large, non-reactive pot. - Candy thermometer - Big spatula. 
Step One: Before you do anything, fill your canned water with water and light it on the stove. Start it now, because it will take 400 hours to start boiling.
This is the only annoying part of canned food. 
Blueberry is preparing to break. Step Two: Wash and prepare your fruit. Remove all stems and discard bilberries with bruises, cuts or holes. Measure 3 pounds. from fruit and start crushing them with potato masher or fork. Crush the fruit with a layer.
First of all, take the appropriate banks. The amount and quantity of each housewife determines at will, as long as all banks are free of defects. Carefully inspect each of them for the smallest cracks, scratchy beads, and serrations - all of which may ultimately have a deplorable effect on the lifespan of our future conservation. The same applies to the covers: they must be perfectly flat.

Step Three: Begin the process of creating a jam. In your jar making jar, bring water to boiling water. As soon as the water boils, add sugar and mix. Stir frequently to avoid burning sugar. Your sugar should boil and make a lot of nice bubbles.
Step Four. By now, your banner with water should start to boil. Sterilize your clean jars by placing them in a banner with a water bath for at least 10 minutes. Meanwhile, start a small saucepan with water on another burner on the stove and bring it to a boil. Put your jars in the jar. Flush can lids for at least 10 minutes. This will make the rubber parts of your covers nice and soft.
Methods and means for sterilizing empty cans
Modern mistresses were lucky much more than their predecessors, who were engaged in conservation a couple of decades ago. Today there are several ways to sterilize jars for jam, and you are free to choose the one that seems to be more efficient and more convenient than the rest.

Step Five: Add your chopped fruit to the sugar mixture and mix again. Bring the mixture to a boil and gently boil for 15 minutes. At this point, your fruit mixture should look like thick syrup. Keep in mind that after the water bath process, this material will become thicker. As soon as the mixture reaches the desired level of damping, turn off the burner and remove the pot from the stove.
Step Six: Your jars must be sterilized by now. If your banks are not ready, everything is in order, just sterilize them now and keep the mixture of boiling jam while you wait. Remove the jars from the banner and place them on a clean towel. Remove the hot jar lids from the stove and place the pot on a stand or towel next to your jars.
- Water vaporAt the disposal of our mothers and grandmothers there was only one method: sterilization of cans with water vapor over a saucepan or kettle with boiling water. To use this proven method, pour water into a wide dish (pan, metal bowl or basin) and put it on a fire. When the water boils, do not turn off the flame, but place a metal sieve of a suitable diameter on top. Place the jars face down on the sieve. Three-liter jars should hold over the ferry for about 15 minutes, for the liter and 10 minutes is enough. As soon as water begins to flow down the inner surface of the can walls: the cans are sterilized and ready for canning. If you used a kettle to get water vapor, you can hold the jar above its spout by wrapping it with a kitchen towel. The rest of the technology does not change.
- Microwave oven. If the grandmother's method is not to your taste, call on modern household appliances for sterilizing cans. For example, it is very convenient to do it in the microwave. The only drawback of this method is the limited space inside the microwave oven, so the procedure will have to be carried out several times. In addition, not every bank will fit in the furnace height. Otherwise, everything is very simple. At the bottom of each can pour clean water, about two centimeters. Banks with water, put in a microwave and turn it on at maximum power. The water in the cans boils quickly and begins to evaporate, thereby sterilizing our dishes. As soon as all the water evaporates, you can take the jars out of the microwave and place jam in them.
- Oven. Those who are afraid to use the microwave for such unconventional actions will be able to sterilize the jars in the oven. Simply place empty clean cans with the neck down on the cold oven grate. Turn on the oven for 15 minutes, and after this time the banks will be sterilized and fully prepared for the canning process.
- Double boiler. And, of course, it is logical to use such a household appliance as an electric double boiler to sterilize cans. It can be an excellent sterilizer: simply place clean cans with the neck down and turn on the cooking mode. 10-15 minutes will be enough for the banks to become sterile.
All these methods relate to empty cans intended for later laying in them of jam or other preparations for the winter. But some housewives sterilize already filled cans. To do this, you need to put a towel on the bottom of a wide pot, and not put it tightly in jars, pour cold water on it. Banks should stand in a pan strictly vertically and fit snugly against each other, not hang out and not move in a pan. Light the fire, and after boiling water, “boil” the jars in a saucepan for about 15 minutes. After this, the lids can be rolled up and left to cool in a dry place at room temperature.
When choosing lids, make sure that they fit the diameter of the neck of the cans perfectly. Any gaps and discrepancies are not allowed. The lids also need to be sterilized, and you can do this with any of the methods for sterilizing jars listed above. Not suitable for sterilizing covers only microwave. It is enough to hold over the steam or to sterilize the oven in the oven for 2-3 minutes.

Step Seven: Now you are ready! Put the hot jam in the hot jars, leaving inches of free space. Once you have filled the jar, immediately insert the small wooden end of the trowel handle into the jar and run it around the inside of the jar. This is done so that all air bubbles are removed from the can. After you finish, immediately wipe off the bezel of the can with a clean, damp paper towel. Using a magnetic wand or tongs, remove the lids of the can from warm water and place it on top of your can.
It is very important to understand that the sterilization of jars and lids for jam is necessary not only for preservation to stand as long as necessary. In non-sterile banks, in addition, bacteria are often infused that can cause food poisoning, sometimes very severe. Therefore, treat the sterilization process responsibly enough - this is important not only for the preservation of the jam, but also for the health of your family members.
Place the metal tape around the jar and screw it slightly, without tightening it. Repeat this process with all banks. If this process sounds very difficult, it is not. Watch this great canning video and see how easy it is.

Example: free space on a half pint jar. If you have residual jam, put it in a plastic container or the remaining jar and store in the refrigerator. You can eat it immediately and do not need to process it. Step Eight: Using a wire mesh rack, place your jars in a banner with a water bath. Make sure you have at least 2 inches of water above your jars. Bring water to a boil, wrap and process for 10 minutes. After that, turn off the stove, let the water stop boiling, and remove the jars from the jar with a lift or tongs.
Sterilization of jam cans is quite a delicate matter, requiring at least some experience from the hostess. Do not be discouraged if the first time fails or something goes wrong. In addition, each housewife gives preference to his method, chosen among the rest by trial and error. Talk to your mom, your friends, do not be afraid to experiment on your own. Of course, it is a pity to lose billets for the winter due to improperly prepared cans or lids. But over time, you will master all the nuances of this process, and your jam will delight the household all winter.