Mirror cake on the Internet made just a huge BOOM! A separate "thank you" for such a trend in the confectionery world should be told Olga Noskova - a confectioner from Ufa. Mirror glaze looks perfect on cakes, creating perfect outlines and attracting people's looks.
Mirror cake becomes so because of the special kind of glaze - mirror. Otherwise, the mirror glaze is also called glossing. Prepare mirror glaze is very simple, although at first glance you can not say :)
Here are some tricks that will help you make the perfect mirror cake:
1. Mirror glaze is good only for completely frozen cakes (the cake should be cleaned in the freezer for 3-4 hours, and best of all for the whole night), otherwise it can become covered with bubbles.
2. On the mirror cake is best to use sheet gelatin, it is he gives a glossy reflection on the mirror glaze.
3. Make a mirror cake can be made from almost any cake, it is important only to cover it with a layer of white chocolate or white glaze before applying a mirror.
4. To increase the brightness of the mirror glaze before staining, first paint it in white, then the shades on the mirror cake turn out to be saturated.
5. A mandatory step is to filter the glaze through a sieve, after whipping, so we will get rid of excess bubbles after the submerged blender.
6. The finished mirror glaze is covered with a food film straight "butt" glaze, and not over it. This procedure is done so that excess air does not get between the food film and the glaze.
7. Work with mirror glaze can only be done when it has reached 35C. To begin earlier not to cost, it is necessary to give time that mirror glaze has cooled down.
8. Mirror glaze is stored in the refrigerator for two to three weeks, during this time nothing will happen to it. The necessary amount of glaze is measured, heated in a microwave or in a water bath.
9. Before staining the cake with glaze, place it on the metal grill, and place the tray under the grate itself, so that the excess glaze will flow there. The remaining glaze can be used again, only when it is 35C.
10. If you want to make a gradient pattern on a mirror cake, then apply different glaze colors at once. If you want beads of stripes, you need to wait for the first layer to dry up a little.
11. If you read this article is not on the site tasty recipes, it means it was brazenly stolen, without even reading it, so visit us, we will be very glad to see you.
12. Leave the mirror cake to stand for 10-15 minutes, so that the glaze "grabbed". You can slightly trim the bottom of the cake with a spatula or confectioner's spatula, so that there are even edges.
13. It is not possible to replace gelatin with agar-agar. Of course, you can try, but you will not see the mirror on the mirror cake, the composition of gelatin and agar-agar is different, pay attention to it.
Mirror cake and mirror glaze

Ingredients for a mirror cake with a diameter of 22-25 cm:
For cakes on a mirror cake:
You can use sponge cakes or any other cakes that you like (recipes of all cakes)
It is best to make mousse cakes alternately with sand layers in large silicone baking molds
A prerequisite is that the cakes must be well chilled before pouring a mirror glaze
Filling on a mirror cake:
Choose what you like: a chocolate layer, strawberry, raspberry or any other stuffing, banana, etc.
To choose any stuffing it is possible at us on a site in section recipes -\u003e cakes or under the link .
For the main glaze on the mirror cake:
This glaze is made to make the mirror glaze better. The main glaze can be based on chocolate, Swiss meringue, butter and egg whites.
It is important that the main frosting is necessarily white. View different types of glaze and choose the recipe of the one that you like .
For a mirror glaze on a mirror cake (mirror glaze on a cake 22-25 cm):
Glucose or corn syrup (necessarily thick!) - 300 g
Sugar - 300 g
Clean filtered water - 150 ml
Condensed milk (condensed milk) - 200 g
White chocolate - 300 g
Leaf gelatin - 20 g
White food color - 1-2 tsp.
Colored food colors as needed

Method of preparation: mirror cake and mirror glaze
1. We prepare cakes for a mirror cake. For cakes on a mirror cake, you can take both biscuit cakes, and a mousse base with layers of cookies. The base should be made in silicone for baking. In a large form is filled with mousse, for example strawberry or banana on 1/4 part. Next, lay out the cookies, then again the mousse and again the layer of cookies. Mousse cakes can be found on our website.
2. Make the filling and the main icing on the mirror cake. After you have made cakes or a mousse base, prepare the filling for the cake and the cream. Next, we collect the cake and completely cover it with the basic glaze. Be sure the main glaze should be white. We remove the cake in the freezer for 3-4 hours, and it is best for the whole night.
3. We prepare the mirror glaze (gloss) on the mirror cake. In a medium saucepan with clean drinking water, soak gelatin sheets (20 g), according to the instructions on the package. You can also use powdered gelatin, but then you can not get a glossy gleam.
4. In another saucepan pour out the sugar and pour water (150 ml). Slightly mix a whisk or a silicone spatula to make the sugar dissolve. If you read this recipe is not on the site of tasty recipes, it means it was brazenly stolen, not even read. Add glucose or corn syrup, mix until homogeneous.

5. We put the previous mass on the middle fire of the plate, stirring occasionally, so that the sugar continues to dissolve. Once the sugar has completely dissolved, it is no longer necessary to interfere. We leave the sugar syrup on the stove to make it boil. Once the syrup boils, immediately remove it from the plate and turn off the fire. Boil the sugar syrup is not necessary, the approximate temperature is about 103C.
6. In a large bowl, pour in the condensed milk and break the white chocolate into slices. In the condensed milk we add chocolate segments, pour in gradually hot sugar syrup and stir with a silicone spatula until uniform.
7. As soon as you add all the sugar syrup and you have a homogeneous mass, you can safely add the pressed gelatin. Again, everything is mixed with a spatula or a tablespoon. Next, using a submerged blender under an incline, we begin to mix the mass so that it becomes homogeneous.
8. In the resulting homogeneous mass, add a white food color, about 1-2 tsp, again mix everything with a submerged blender. If you use a dry white food color, and not gel, then it must be pre-soaked.

9. Prepare a homogeneous white-colored glaze through a fine sieve to remove any excess vesicles that formed during whipping with a blender. We cover white glaze "back-to-back" with a food film, and not from above, so as not to create excess air between the film and the glaze.
10. It is possible to start working with mirror glaze only at a temperature of 36 ° C. Stain the glaze in the colors you need with food colors. You can do this in different containers, if you need pure colors of mirror glaze or in one, if you want the effect of ombre on a mirror cake.
11. We build a small structure and put a well-frozen cake on a metal grill, and under it we put a tray to mirror the glaze exactly there. Water the cake with a mirror glaze. Create new colors if necessary adding a new color.

12. Leave the mirror cake to dry for 10-15 minutes. Next, we clean the refrigerator for 2-3 hours, so that the mirror glaze is well frozen. Remains of mirror glaze can be cleaned in the refrigerator and saved for other culinary delights! :)
Mirror cake and mirror glaze. Ideas and decoration options.

Mirror cake is decorated with sandy crumbs from below, a mirror glaze of beautiful bright turquoise color. The cake is supplemented with fresh berries of red currant, strawberries and fruit slices.

Mirror cake in the style of "minimalism", mirror glaze is used in two colors: dark blue and turquoise. It is decorated with a small amount of raspberries and blueberries.

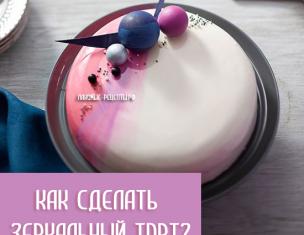
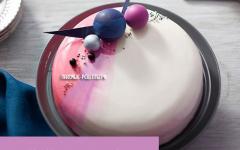
Mirror cake in the style of "ombre", mirror glaze of three colors: violet, fuchsia and white. Decorated with confectionery powder and edible flowers.
![]()
Figured mirror cake, decorated with berries, mirror glaze of the same color - violet. This form was achieved due to the silicone form for baking.


Cosmic mirror cake, decorated with edible sparkles, mirror glaze of several colors. On this cake you can see beautiful gradients.

(Mirror cake and mirror glaze)

Mirror cake in the form of a donut. Mirror glaze on the cake is made in lilac color, the bottom is decorated with sand crumbs, and the top of the blackberry berry.

(Mirror cake and mirror glaze)

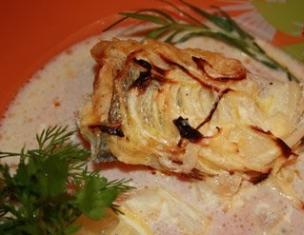
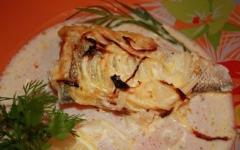
Mirror cake and chocolate mirror glaze. The cake is decorated with feathers of white chocolate, inside chocolate mousse and banana filling.

(Mirror cake and mirror glaze)

Three-layer mousse cake, the top is decorated with a chocolate ball. Mirror glaze of bard color. One of the most complex mirror cakes.
You may also like our other delicious recipes of cake mousse:
 CAKE WITH RASPBERRY MUSSEL WITHOUT BAKING
 BANANE CAKE-ICE-CREAM WITH MUSS AND WHIPPED CREAM

Cooking time: 20 minutes
Number of servings: 1 cake up to 22 cm in diameter or 8-10 cakes
How to prepare a colored mirror glaze, step-by-step recipe with a photo:
12 g. gelatin poured 60 ml of water and leave for 15 minutes to swell.
Step 2. Glucose syrup, sugar and the remaining 75 water in a saucepan or saucepan and bring the mixture to a boil over medium heat, stirring constantly.

Step 3. Add the white chocolate to the hot syrup.
If you want to make a perfectly white mirror glaze, you will have to look for titanium dioxide, which will bleach the icing from the original ivory color. It can also come in handy for giving products brightness and color saturation. The glaze itself is translucent, so properly calculate the amount of dye.

Step 4. And pour the condensed milk.
Ideally, if the composition of condensed milk is only sugar and milk, otherwise, the colored mirror glaze may curl.

Step 5. Swollen gelatin is dissolved in a water bath or in a microwave (15 seconds is enough) and pour it in a thin trickle into the syrup.

Step 6. Immediately after the gelatin, add the dye to the glaze and beat it with a blender until a uniform color is obtained.
The dye can be helium or dry, it does not matter. During whipping, you can add more pigment, if the glaze seems to be not enough saturated.

Step 7. The finished mirror glaze is best filtered through a sieve, releasing it from the air bubbles that formed during whipping.

Many confectioners leave the glaze in the refrigerator for 24 hours before starting work, but it's more convenient for me to work with it right away. The cooling process, and the next day warming up and a new filtering is too much inconvenience. Just do not forget, that the working temperature of the mirror glaze is 32-35 degrees, first cool it to the desired temperature and only then start to decorate your cakes and pastries.
Today I give two custom cakes - both girlish, and so in the decor I used chocolate flowers and bewitching mirror glaze. And yesterday, when I prepared the icing, painted it in the right colors, I again came up with the idea of making a separate publication on it. Recipes of mirror glaze are many, but I'm sure that many people who are keen on mousse cakes are working with this recipe - on chocolate with condensed milk. Recipes photos, as well as video inside.
Yes, I decided to gradually dilute the photos in the blog and video. Your channel I started it when with a friend we started filming a culinary heading for a local TV, but after finishing work on it, I still want to support the video channel, and if in the mini-video I often appear on the mini-video, there are no full ones yet. We will correct and learn to shoot a video.
Until I went directly into the glaze, I want to briefly tell about my news. First, every spring, I'm beginning to be drawn to do something with the blog, and so this time I perkolbasila all tags in an effort to systematize them, because they accumulated a lot. And so now the tags are divided into several groups: tags with the "-" symbol are tags by the type of the test; tags with the "=" icon - types of dishes; tags ":" - these are the tags for the main ingredients of the dish, and the tags without the badge in front are all the rest. I think that it will be easier to orientate in them, and this will facilitate the search for certain specific materials. It remains to fix all the tag links in the articles!
Another news - I finally made her business cards . Procrastination was lasting, but I won it. Not without the participation of one gift, which somehow also show. So now I have two kinds of business cards and stickers for my sweets. For the framework I chose the favorite white color and painted the business cards with two color combinations to choose one as a result. I like the one more that with a white background and a black inscription. I really like polygraphy with selective varnish, so the whole card is matte, and all the inscriptions and information text are glossy.
And one more thing is that I passed a course on cheese , and therefore now I plan to master this business and introduce it into my life. And in the life of other people, of course! And the very idea that the house will always be delicious, natural, real (!!!) cheese makes me very warm and irresistibly attracts. Gradually I zatarize the necessary tools and work on the regular intake of milk.
And I registered on vkontakte . Ho, I had already retired from there a long time ago, but I decided to go again, paying the main attention to my confectionery Praline in the special. group. My page there will be hanging, so all the main thing is in the group itself, which I will gradually fill out with pictures and information. Well, we can also talk there, come. So if you prefer to use this social network, there will be a confectionery, and a repost of links to a blog with recipes.

Ingredients:
150 grams of sugar150 grams of glucose / or invert / syrup
75 grams of water
12 grams of gelatin+ 60 grams of water (gelatinous mass)
100 grams of condensed milk (good!)
150 grams of chocolate
dyes (I use gel, paste and dry, for glaze bleaching - titanium dioxide)
As a replacement for glucose syrup I use homemade. When I prepare the frosting on white chocolate "Millenium" (which, according to my sensations, is soft), I take not 12, but 14 grams of gelatin.
Gelatin fill with water and allow to swell. Mix sugar with water and glucose (invert syrup). Bring the syrup to a boil, stirring to disperse all the sugar. As soon as the syrup begins to boil, remove it from the fire. If you overdo the syrup on the fire, it will overheat, and the finished glaze will be thicker than necessary (it should be 103 degrees).
Chocolate to break, add condensed milk, pour hot syrup. Stir, and then add the swollen gelatin (I used to pre-dissolve it in the microwave). Add dyes (glaze in pure form on white chocolate gives the color of the ecru, so for white use titanium dioxide).

Thoroughly pierce the glaze with a blender, immersing it in a bowl in such a way as to capture as little air as possible.

After the preparation of the glaze must be filtered, then covered with a film "in contact" and left overnight in the refrigerator. Before glazing, warm up to make it homogeneous, and work at the right temperature.
Nuances and possible problems:
1. Working temperature of glaze 32-35 degrees. For dark chocolate (56%), it is better to glaze at the upper temperature boundary, and for white chocolate on the lower temperature range. By this time, the cake should already be on the stand / grill, it must be ready to spawn to remove the dripping drops.2. Mirror glaze must be covered only completely frozen flat product (with the exception, for example, of decorative stains on other kinds of cakes, where it should not form a continuous smooth surface). Taking the product out of the ring, quickly remove all the films, and gently prune it with your hands. it smooth the corners and the surface, and remove the outer ice layer, allowing the glaze to better grasp with the product. This trick is one of the possible solutions to the problem with the glaze draining from the sides. Once stroked - immediately glaziruem. Avoid Condensation.
3. Bubbles in the glaze. For me this is a constant problem. To deal with this, it is necessary to very carefully immerse the foot of the blender in the glaze, as if obliquely, so that air gets there as little as possible. When whisking, move the blender gently, without grasping the air from the surface. Form a kind of funnel, which will not frost the glaze. In addition, I specifically bought a separate blender with a flat design of the lower leg for these purposes. With him, the result was better. Blender budget Maestro with the same knife in the kit, with which whip the glaze with a fairly well-known blender Bamix (3 straight blades and one bent). The disadvantages of this blender are that at first it burned out because of the factory marriage, but in general it is low-power, so you need to watch, so as not to fool the baby.
If the glaze is still napuzzy, you can strain it through a fine sieve, then pour it into a container, hit it against the table several times, so that the bubbles go up. Then it is necessary to cover the glaze with a film "in contact". If, after this, small bubbles remain, they need to be carefully cleaned together with the top layer of the glaze.
4. If by the time the glaze reaches operating temperature it too thick (I have one more common problem! I sin on the fact that I'm inverting myself, so I'm going to somehow buy glucose to check this hypothesis), it can be diluted with a simple syrup 1: 1 (Tatiana Verbitskaya's recommendation). This trick rescues me, usually literally 1-2 hours of spoons. If the glaze too liquid, you can let it cool a little more (28-30 degrees).
5. You can achieve the most various coatings with the help of glaze:
- homogeneous (one color)
- combined (the product is covered with glaze, then an additional color is applied on top of the spout, the glaze of several colors is poured into a common container from which it is already poured onto the product - this helps to get beautiful cosmic effects with color transitions)
- glaze is applied to a glazed product covered with a glaze, using a confectionery bag
- the mirror glaze is combined with a neutral "leopard"
- on a mirror glaze the spray of other color is put
On the mirror glaze, an original pattern is applied with kandurin mixed with vodka, in the form of circles (or other shapes).
6. After the product is coated with glaze, you need to gently take off the excess. Give a delicate couple of minutes until you see that the glaze has almost ceased to drain, leaving only long dragging drops. These drops must also be carefully removed by the spaulent, bending under the bottom of the product. Do not touch the hands, otherwise the glaze will stick, or even stretch or even slip.
7. It is necessary to transfer the jigged product to the substrate or dish by means of a spatula (or two), with quick movements so as not to dilute the mud: they were taken to the spaulent, transferred to the substrate, lowered slightly by one edge, so that it touched the substrate, then quickly, but carefully took out the spaulo, trying not to touch the layer of glaze. To the bottom edge looked neat, it is made with pieces of nuts, chocolate, waffles ... (the list can be continued indefinitely).
8. After frosting, the frozen cake is transferred in the refrigerator for 5-6 hours for slow thawing.

The process of glazing
One of the easiest ways to decorate home desserts is to decorate the icing. Depending on what result you plan to get at the outlet, the glaze can be cooked on a variety of bases, resulting in a thicker or flowing mixture, glossy or matte, rich black or even colored. In this article we have collected the most notable recipes of mirror chocolate glaze, which is ideal for thin coating of cake.
Color mirror glaze for cake - recipe
Ingredients:
- gelatin instant - 10 g;
- water filtered - 140 ml;
- sugar white - 145 g;
- invert syrup - 145 g;
- chocolate white (qualitative) - 145 g;
- - 110 g.
- the dye is a few drops.
Preparation
Powdered gelatin soak for a while in 50 g of cold purified water. In the ladle we pour the remaining water, pour sugar, add the syrup and put it on the fire. Warm the mass to a boil and complete dissolution of the sugar crystals.
Meanwhile, melt the white chocolate, mix it with condensed milk in a deep bowl and mix thoroughly. Next, pour the syrup into the chocolate mixture and stir. Gelatin is heated to dissolution and poured into the rest of the ingredients. Add a few drops of gel dye and mix. You can use a blender.
Now strain the glaze through a fine strainer to get rid of air bubbles, cool it down to 30 degrees. If you want to get liquid glaze that will drain around the edges of the cake, you need to cool the mass to 30 degrees, and to cover the whole cake 32-35 degrees.
Before you cover the cake with a mirror glaze, it is ideal to hold it for one hour in the freezer.
White mirror glaze for cake - recipe
White glaze can be made, both on the basis of ordinary powdered sugar, and with the addition of white chocolate, which, of course, improves its taste and makes it smoother, silky, and accordingly the appearance of the finished product becomes perfect.
Ingredients:
- chocolate white - 135 g;
- cream 33-35% - 110 ml;
- milk - 110 ml;
- vanillin - pinch;
- - 1/2 st. spoons.
Preparation
Before you make a mirror glaze on the cake soak gelatin in a small amount of purified water. Milk and cream poured into a saucepan and set on medium heat. We warm the milk mixture to a boil, remove it from the fire, lay the chocolate broken into pieces and stir until it dissolves completely. Then add vanillin, soaked gelatin and mix it, so that it also completely dissolved. We give the white mirror glaze for the cake to cool to a temperature of forty degrees, and we cover it with dessert, having first filtered through the strainer.
Recipe for a mirror chocolate coating for a cake
Ingredients:
- chocolate - 55 g;
- cocoa powder 85 g;
- cream - 85 ml;
- water filtered - 150 ml;
- granulated sugar - 255 g;
- gelatin - 10 g.
Preparation

First of all, soak in water 10 grams of gelatin according to the recommendations on the package. Mix the sugar in the ladle with cocoa powder, pour in the cream and 150 ml of water and, stirring, bring to a boil and immediately remove from the fire. Throw the broken dark chocolate and soaked gelatin and stir well until complete dissolution. Now strain the mass through a strainer and cool to room temperature.
We place the cooled cake on the grate and cover it with a mirror glaze. Immediately shift the cake to a dish and send it to the refrigerator for at least two hours.