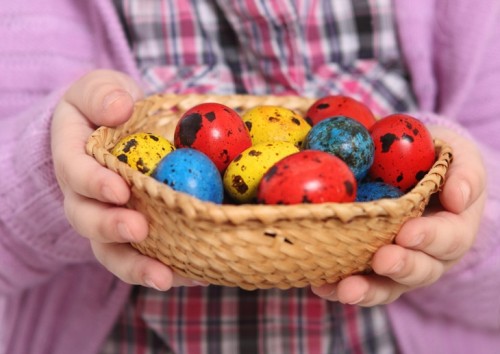
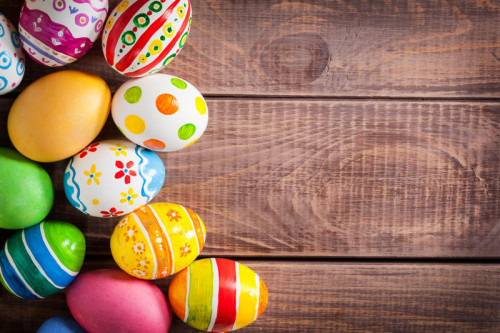
Spring is just around the corner, and with it one of the brightest holidays of the year is Easter. Both adults and children are looking forward to it. The tradition to exchange painted eggs is familiar to every person since childhood. The multi-colored attributes of the holiday, in which we paint eggs for Easter, symbolize the resurrection of Christ and are presented with the words: “Christ is risen!”. “Truly resurrected!” - and the one who congratulated receives an egg in return.
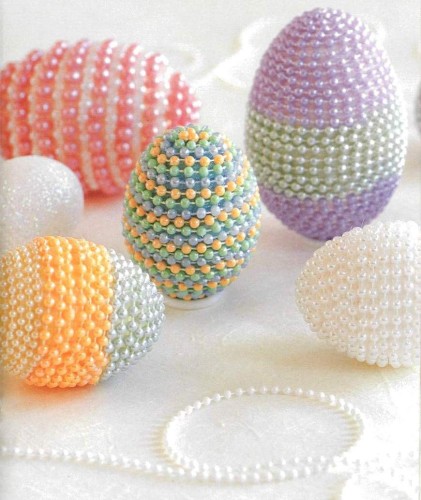
Types of Easter Eggs
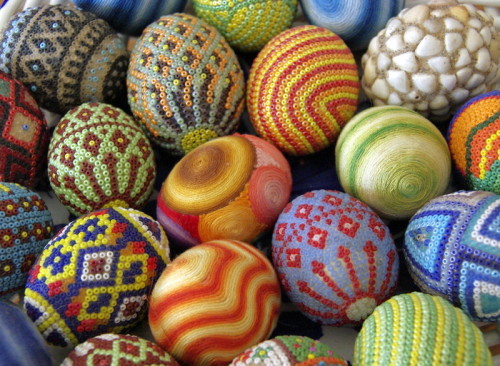
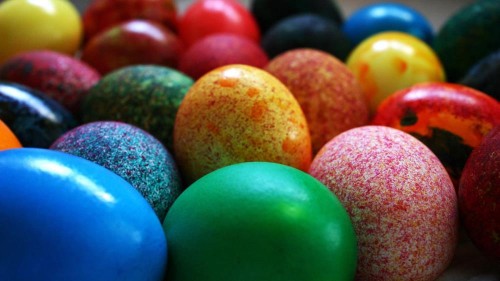
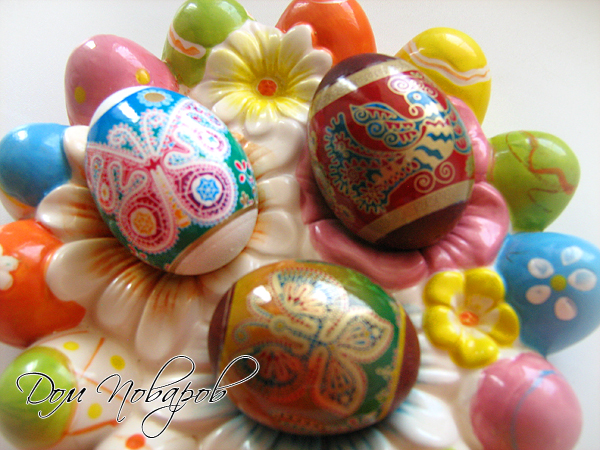
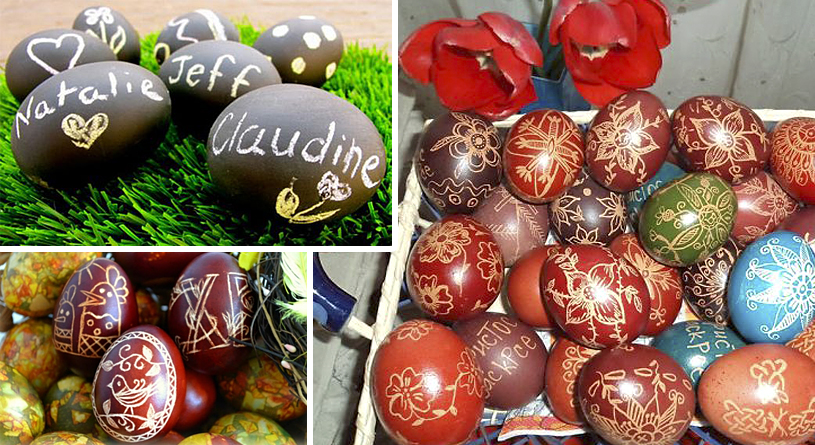
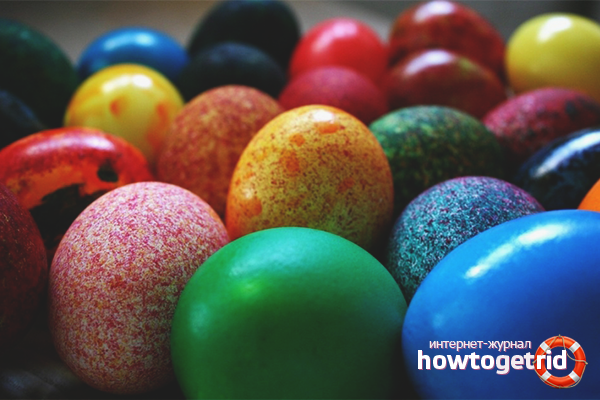
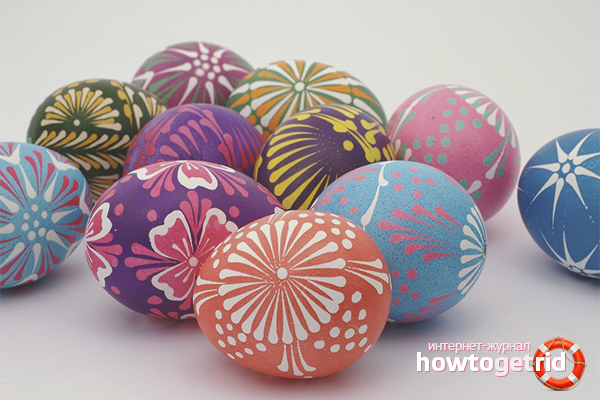
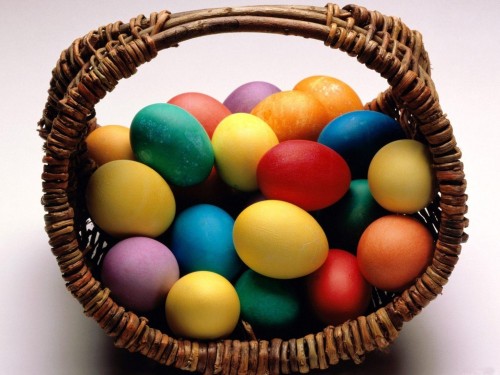
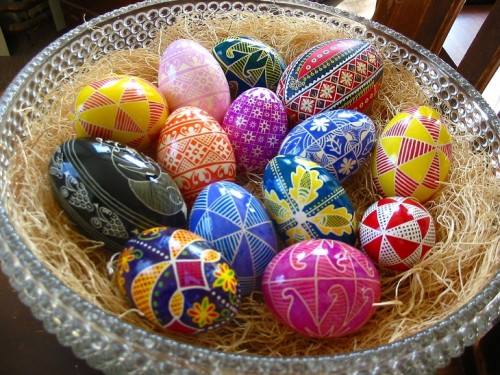
Each hostess tries to make beautiful and unusual eggs on this bright holiday. The name of the resulting eggs depends on how you use it. For example, eggs painted in one color are called Krashenki. Eggs with multi-colored dots due to droplets of wax are called krapank. Drapanka is a one-colored egg with a scratched pattern. With a drawing or pattern made with the help of a special tool - a pen - it is Easter eggs. They are the most beautiful, they can even be called works of art.
Preparation of eggs for painting
There are many ways to paint eggs for Easter. However, regardless of the option chosen, you need to properly prepare. Here are some tips:
- an hour before staining, you should get eggs from the refrigerator to take room temperature. In this case, they do not burst during cooking. The same result can be achieved by puncturing the eggs with a thin, sharp needle;
- in order to lay the paint evenly, they must be thoroughly washed. Color uniformity can also be achieved by wiping the eggs with soapy water or alcohol;
- brilliant appearance painted eggs will get, if after painting to wipe them dry and rub with vegetable oil.
Now you can go directly to the painting of eggs. Here are a few ways, among which everyone can find for themselves the most acceptable.
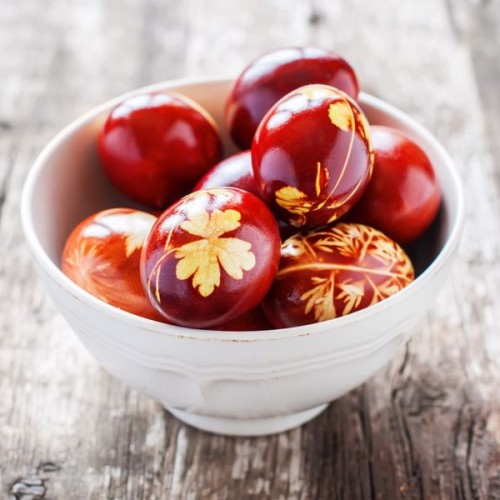
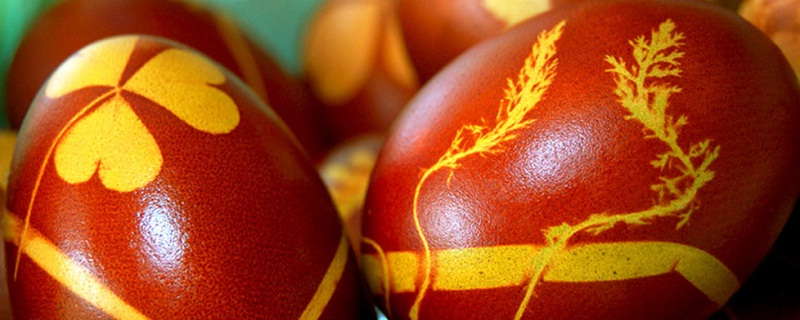
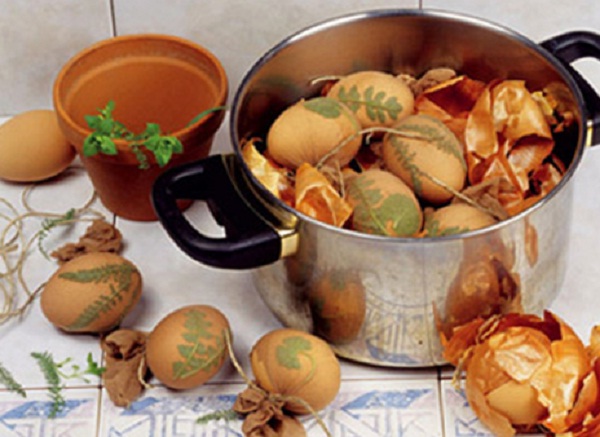
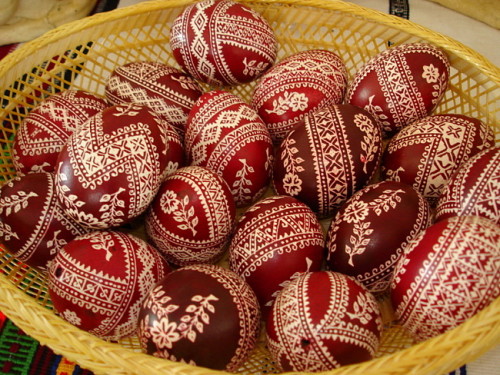
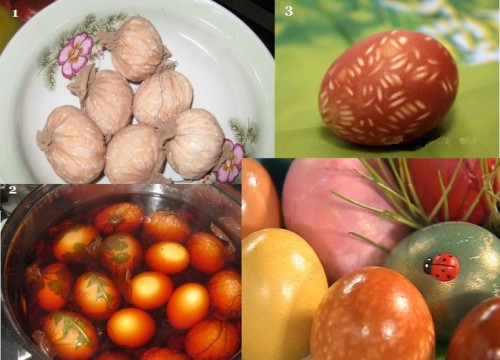
The first way: the classics of the genre - in onion peel with patterns
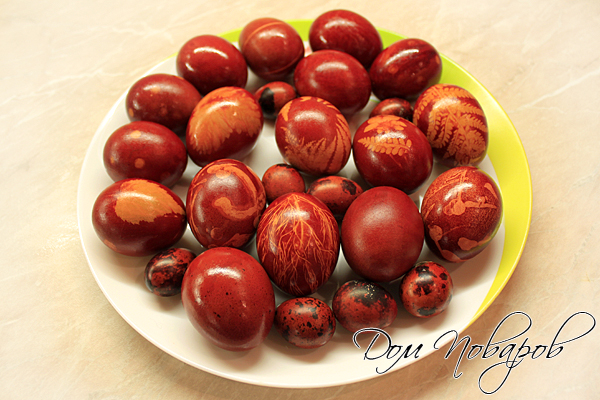
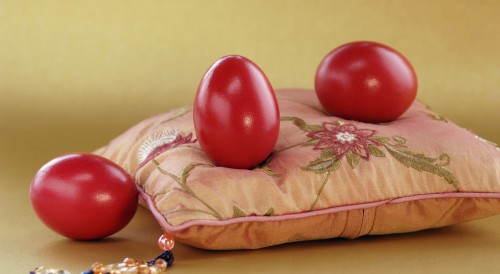
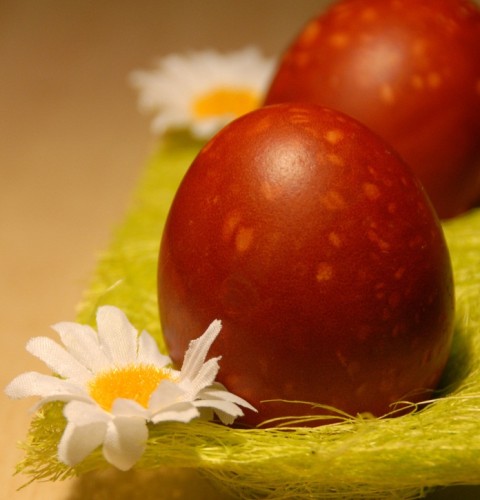
This is the way of our grandmothers, which still remains relevant. As a result, you can get red eggs, as well as yellow, brown or their shades - it all depends on the intensity of the paint and the duration of the staining procedure.
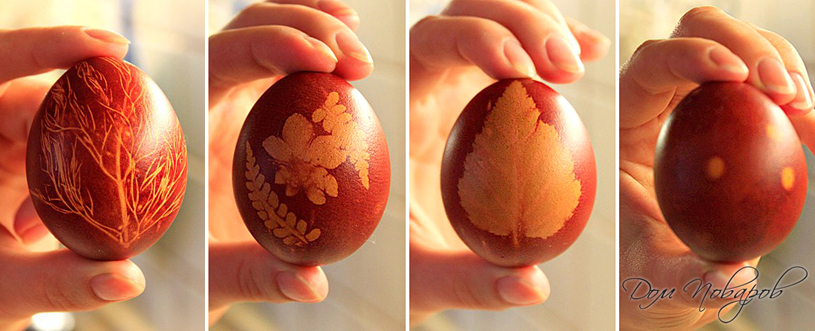
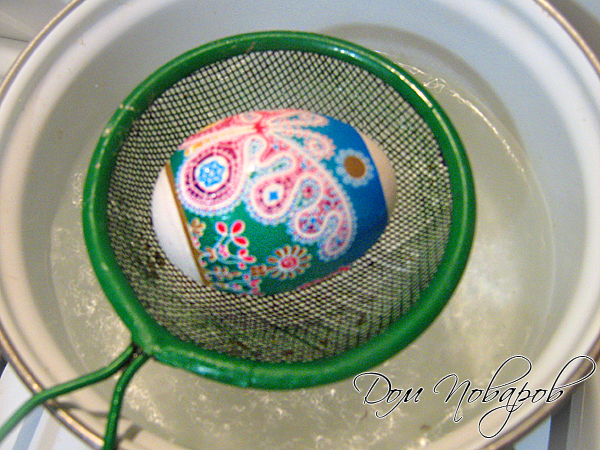
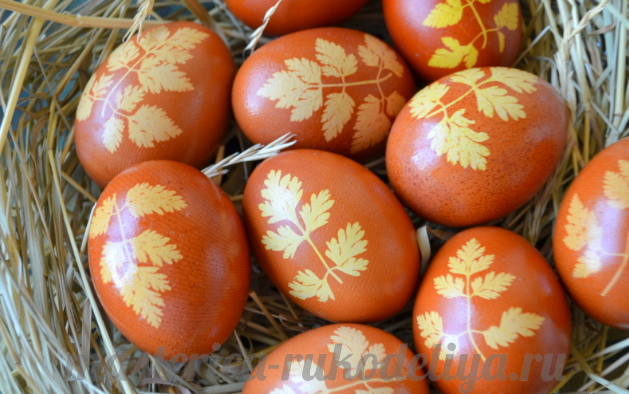
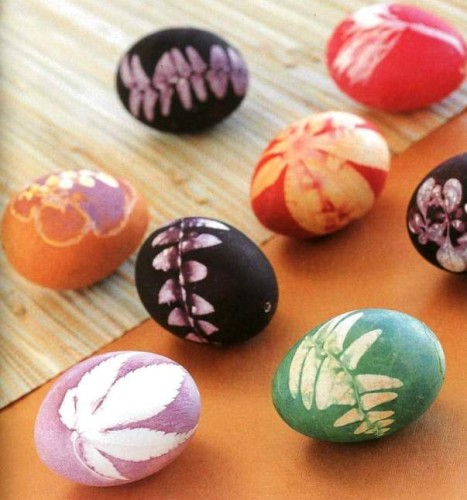
When boiled in onion peel, the Krashenki are monotonous. To decorate them with prints of flowers or leaves, you need fragments of dried plants and what you will fix them on the shell. As a clamp is best to use stocking nylon. If not, you can take the usual white thread or gauze (bandage).
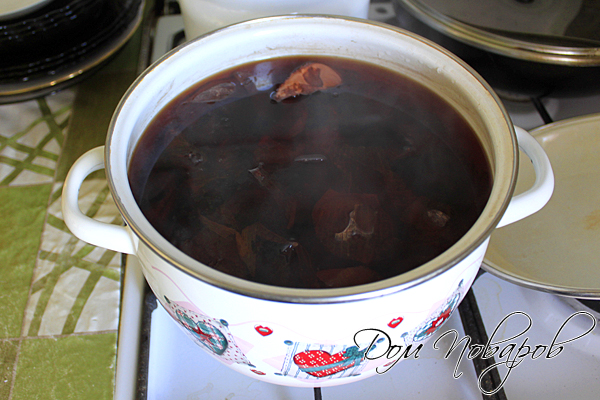
So that dry plants do not crumble during the attachment process, soak them for a few minutes in hot water. After softening, place on a shell and secure, tightening the egg with a nylon, bandage or thread. Next lower the eggs into the water with onion husk and stew.
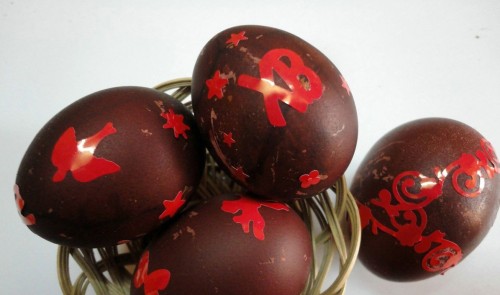
To get straight lines or geometric patterns of natural color on a red-brown background, glue pieces of electrical tape or paper tape to the alcohol-free eggshell of raw eggs. After cooking in the onion husk, the stickers are easily removed, exposing the unpainted areas.
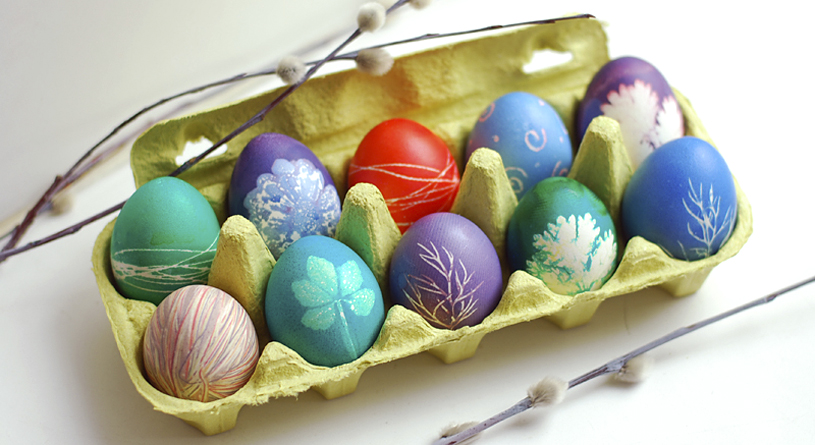
The second way: the gifts of nature - natural dyes
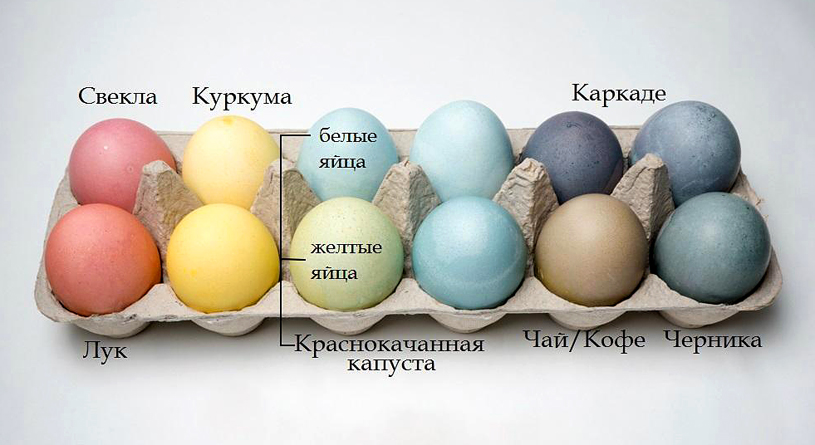
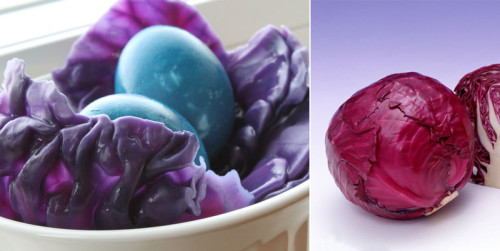
Many natural ingredients have a coloring effect. This allows you to get a variety of colors and shades. Pink color gives beet juice, pale yellow - lemon, orange, carrots, yellow - birch leaves, calendula flowers. Green color can be achieved with spinach or nettle, blue with red cabbage. Beige gives coffee its eggs, and violet gives violet flowers. Some dyes do not act too intensively, for example, violet or spinach, therefore in such broths eggs can be left for the whole night.
- Pour water into the saucepan, add vinegar (1 tbsp.) And natural dye. Bring to a boil. Let the broth stand (about 30 minutes).
- Boil the prepared eggs in the broth, depending on the desired shade - from 15 to 30 minutes. If necessary, you can leave the eggs in the broth and longer - for a day.
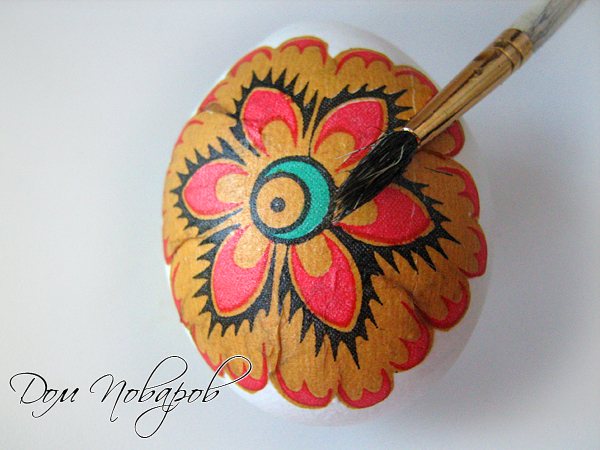
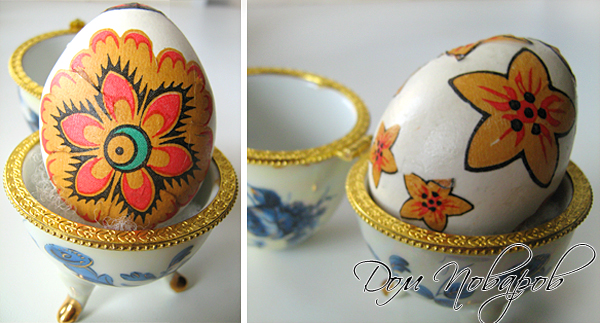
Third: decoupage technique
To decorate an Easter egg with a picture, you do not need to buy stickers. You can decorate it using decoupage technique.

Fourth: Food industry presents - food coloring
One of the most trivial and simple ways - paint eggs using dyes from Easter sets. There is always a recipe, but you can do it as follows:
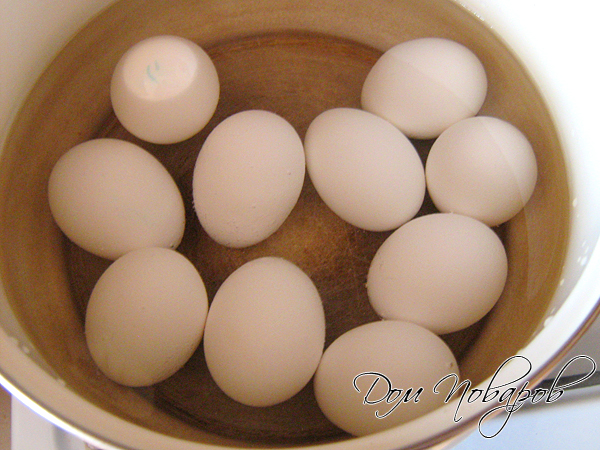
- Cook hard boiled eggs.
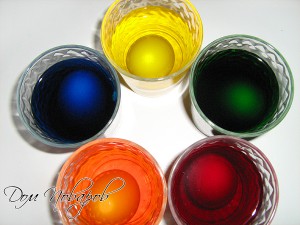
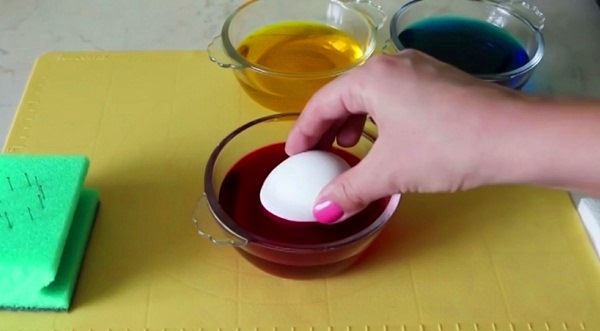
- Dilute the dyes with water - each color in a separate bowl. Water should be enough to cover the eggs. Add vinegar (1 tbsp. L.).
- Keep the eggs in the bowls until they become colored.
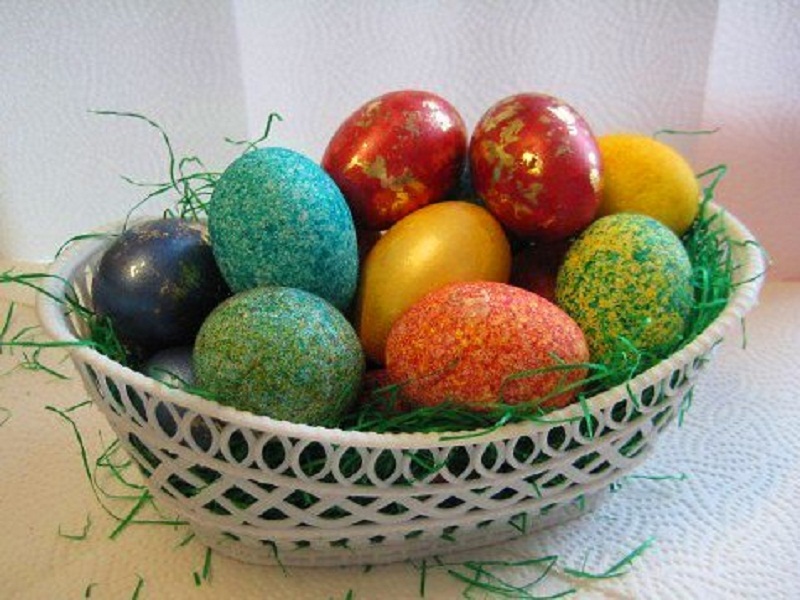
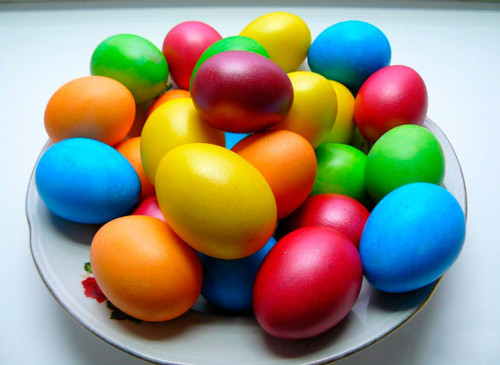
Bright multi-colored eggs are pleasing to the eye.

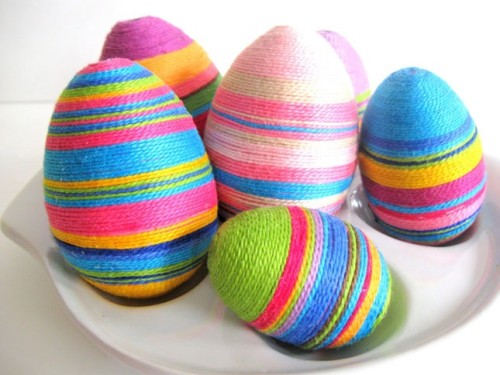
Fifth: a colorful palette - colored threads
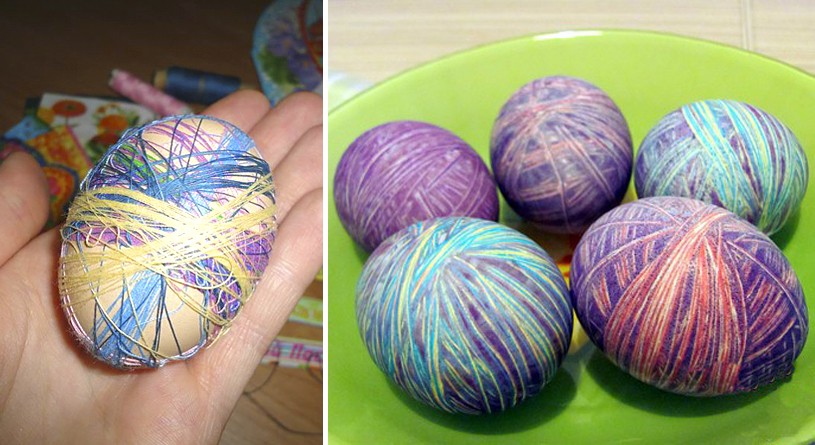
To obtain intricate divorces, we paint eggs with multi-colored floss threads:
- Wind the eggs with threads.
- Cook hard boiled.
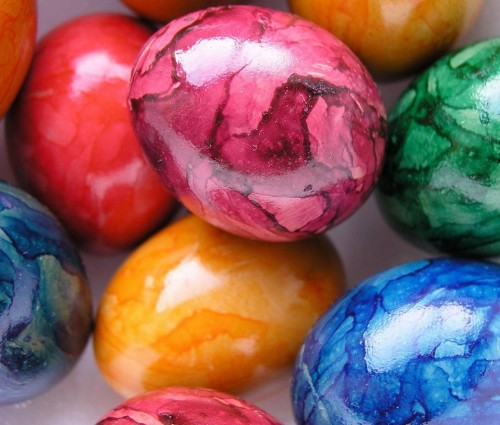
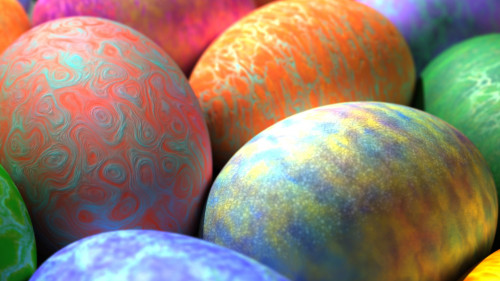
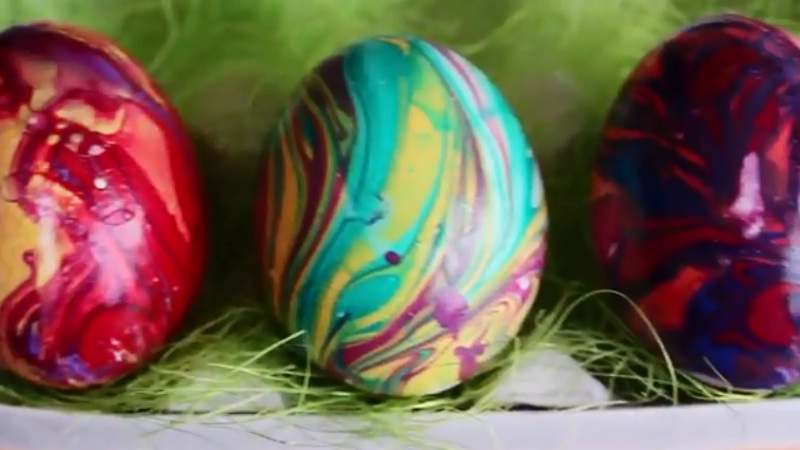
Sixth: marble effect
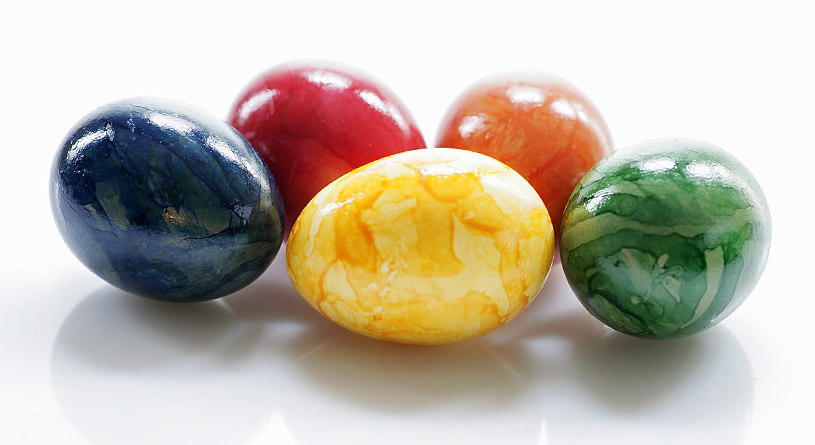
Unusually festive look marble eggs. For their execution you will need paint for eggs of different colors, vegetable oil and artistic flair.
- Color eggs in bright bright colors, for example, in yellow, red, orange.
- Let the eggs dry.
- Dissolve dark colors (blue, brown, purple) with water. Add vegetable oil to each cup (1 teaspoon). Gently stir (do not shake) the oil so that there is a lot of oil “denezhek”, no larger than a pea.
- Dip each egg in a dark color and immediately remove it. Beautiful marble pattern is obtained if you do it no more than once.
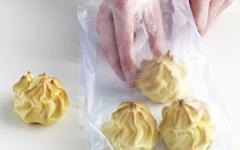
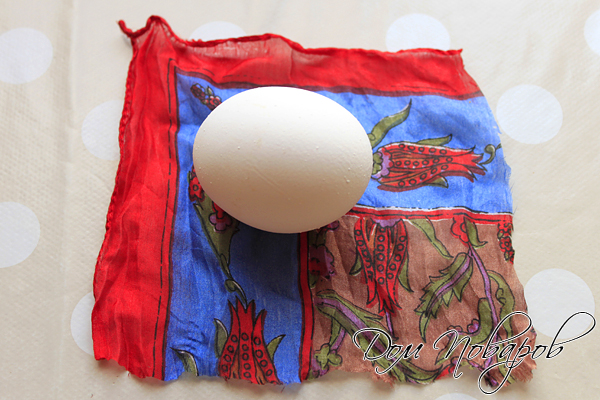
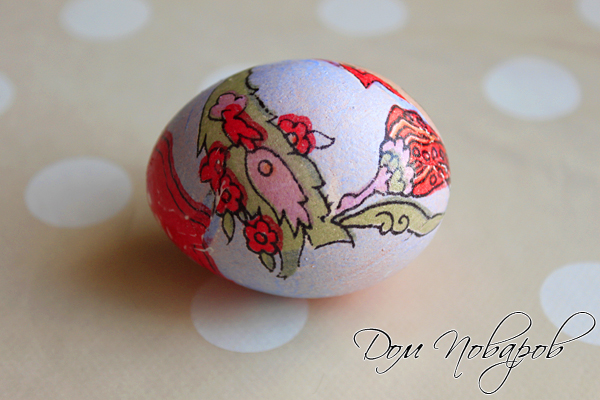
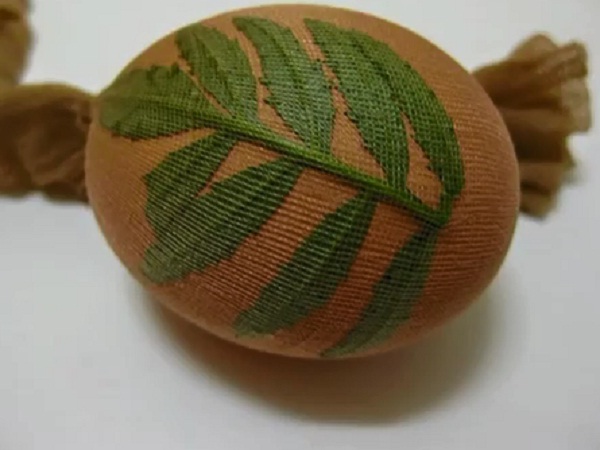
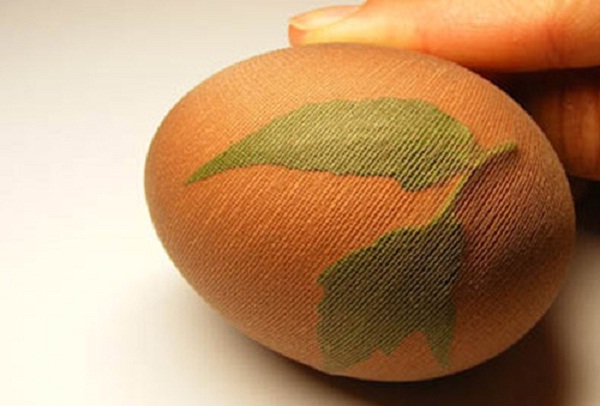
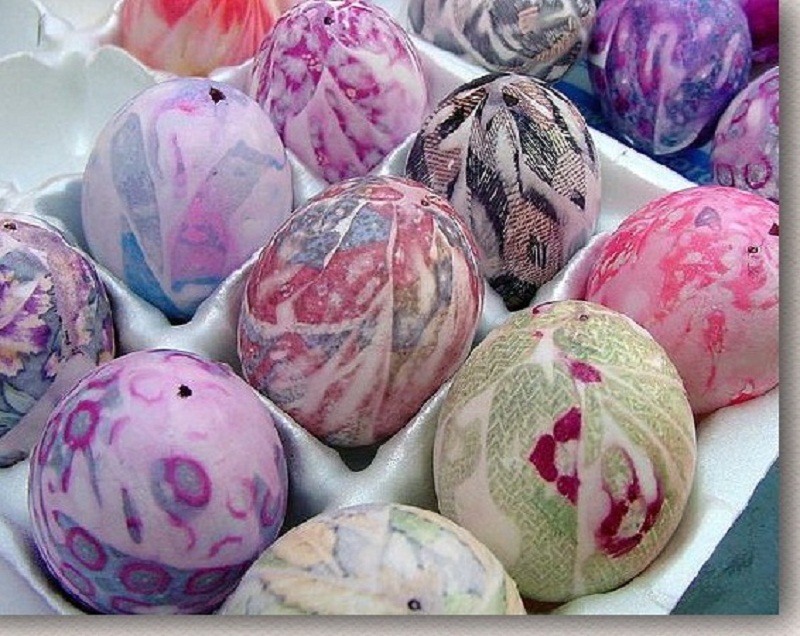
Seventh: eggs in silks
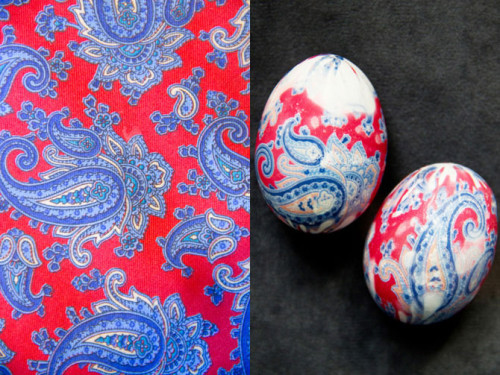
Refined eggs with pictures are obtained by dyeing them with fabrics. You can use a silk tie or Pavlopossad woolen shawl.
- A raw egg should be wrapped in a cloth with a pattern. The front side should fit snugly to the shell.
- So that the fabric does not slip, sew on the contour. Wrap it on top of the colored cotton fabric, securing it at the blunt end.
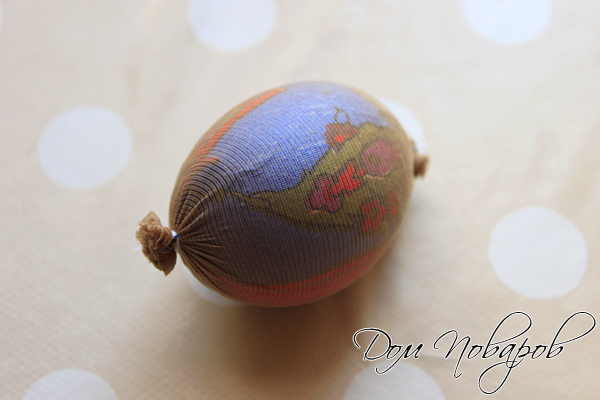
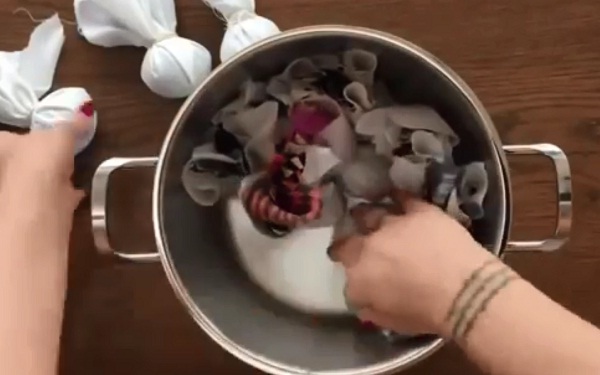
- Pour water into the pan, add vinegar (3 tablespoons). Put the wrapped eggs in the pan and cook for 10-12 minutes after boiling.
- Pour the finished eggs cold water. When they are completely cool, carefully remove the fabric. On the egg will remain a thin pattern, such as on the fabric.
![]()
Eighth: fantasy in patterns with the help of scrap materials
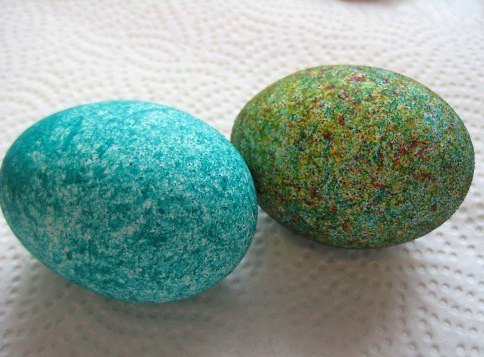
- chaotic specks can be achieved if before coloring wet eggs roll in rice or millet;
- drawing in the form of a leaf can be obtained by attaching a parsley leaf to an egg before coloring and fixing it with gauze or stocking;
- in order for the egg to cross straight lines, you can glue masking tape on its shell or pull a gum for money on it;
- symbols or letters XB can be glued on before painting, using a plaster or masking tape. After painting, they should be carefully removed;
- eggs "in the cell" will be obtained if you cook them wrapped in mesh stockings or in a net of fruits or vegetables.
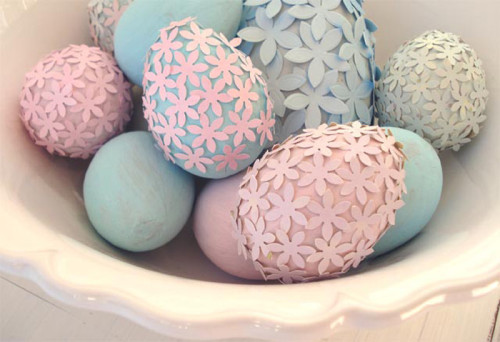
- a lacy pattern will decorate an egg, if, before painting, an interesting lace motif cut out of a napkin is fastened on it;
- paint the egg with wax crayons. The picture will appear at the end of the staining procedure.
The ninth way: for the joy of children - an egg-craft
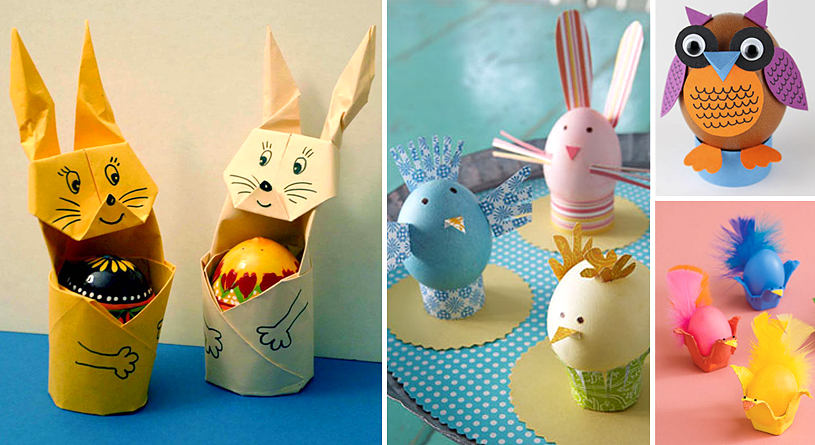
Easter is a family holiday, so you can do decorating eggs with your children. It is possible to make funny chickens from the testicles.
- Cook hard boiled eggs.
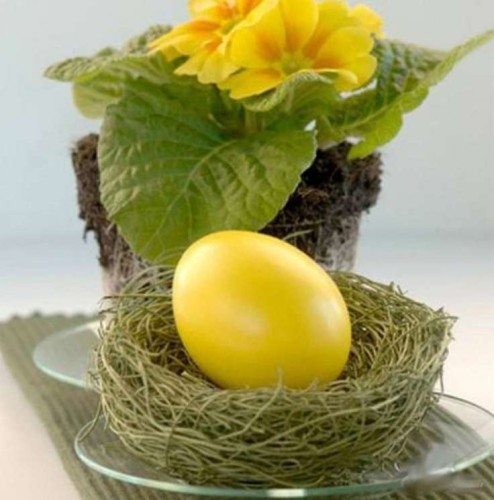
- We paint in bright yellow color.
- Cooking gelatin glue.
- Decorate eggs with pieces cut from colored paper. These are wings, beak, scallop, legs, tail and others (bows, cilia, curls) - it all depends on imagination. Eyes can be glued or just to draw.
Tenth: saving time - hot-melt
A method indispensable for busy people is to decorate eggs for Easter with thermo-adhesive stickers. They are sold on the eve of the holiday in supermarkets, newsstands and other stores.
- Cook hard boiled eggs.
- Put the sticker on the egg. In order to avoid problems with size (the sticker may be small), it is better to choose eggs of medium size.
- Dip the egg in boiling water so that the sticker “hugs” it and takes the desired shape.
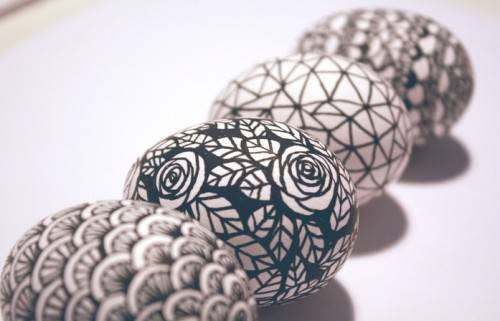
Eleventh: Stencils - Back to the Future
Using stencils to dye eggshell is a relatively traditional way. But as they say, "New is well forgotten old." Recall the times when it was very entertaining to draw images using stencil foundations. Feel like an artist. We suggest you remember this technique and try it on Easter eggs. The result will surprise.
- We cut out from an ultrathin paper (tracing paper) any stencilled image. It can be anything you like (Easter themes, images of saints, and even a favorite brand). You can find an image for the stencil on the Internet or on pages of books and magazines. The better the image and stencil, the result is more effective.
- The stencil base is made wet with water until a plastic paper is formed that is able to take the form of a shell.
- Tightly attach the moistened stencil to the surface. If the picture is small in format, it can be duplicated along the entire perimeter, and not limited to one side.
- We fixed the stencil by wrapping a nylon or gauze. Boil the eggs, using for coloring all kinds of dyes (natural, food).
- Welding them, remove and give the opportunity to cool.
- Remove the material that fixes the stencil and stencil base, only after they have cooled completely.
- On the egg shell is visible, the selected picture.
Twelfth: stylish permanent makeup for eggs
If you are tired of tradition, refuse to use dyes, and the Soul requires something exclusive - there is a solution. Color the egg shell with a permanent marker. As they say "cheap and cheerful."
- Boil them.
- If fantasy "brings", use the existing images and fragments of patterns.
- Put the egg on delivery, so it will be more convenient to put patterns. As a result, the drawing will be uniform and clear.
- Apply lines using a permanent marker.
- After completing the creative process, allow the krashenke to dry. An hour will be enough.
Combine your creativity and imagination of the child, giving him the opportunity to do the same, but only with color felt-tip pens or watercolor paints on the basis of honey. You will be satisfied with both: joint work has.
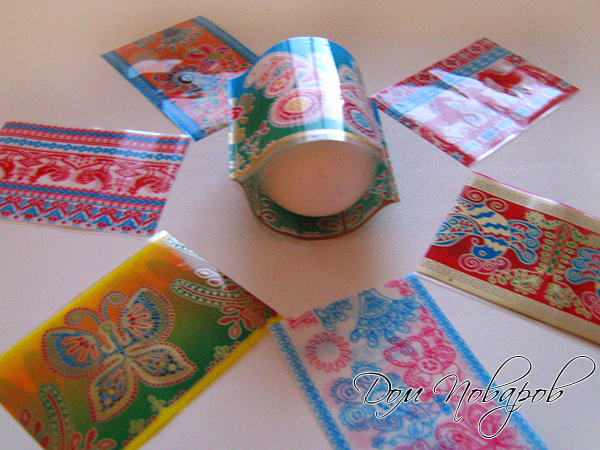
Thirteenth: foil and colored confetti - simple, but tasteful
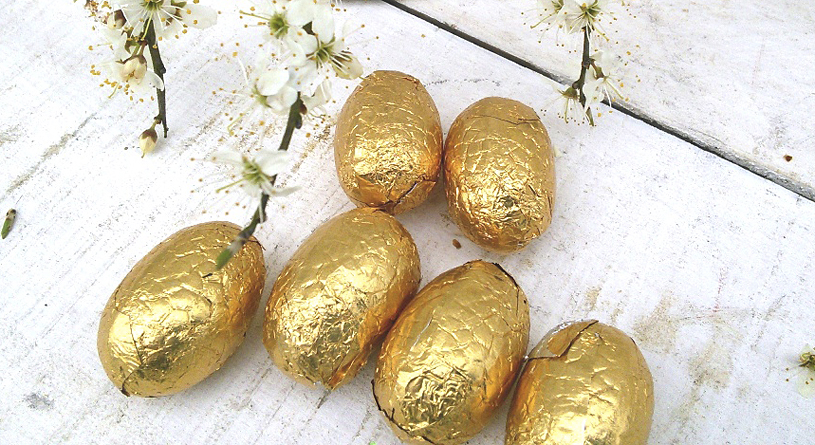
Fashion trends are so diverse that it is no longer necessary to paint Easter eggs, you can take the path of least resistance - to wrap them in colored foil.
- Buy in the stationery store color foil (not limited to standard gold and silver foil) and color paper.
- Boil the eggs.
- Let them cool.
- Cut the foil into equal parts by the number of eggs.
- Pre-make elements for application. Instead of the application you can use ready-made confetti.
- Wrap the cooled boiled eggs in foil, secure the elements of the application or confetti on the foil using glue.
Fourteenth: snow-white patterns of powdered sugar
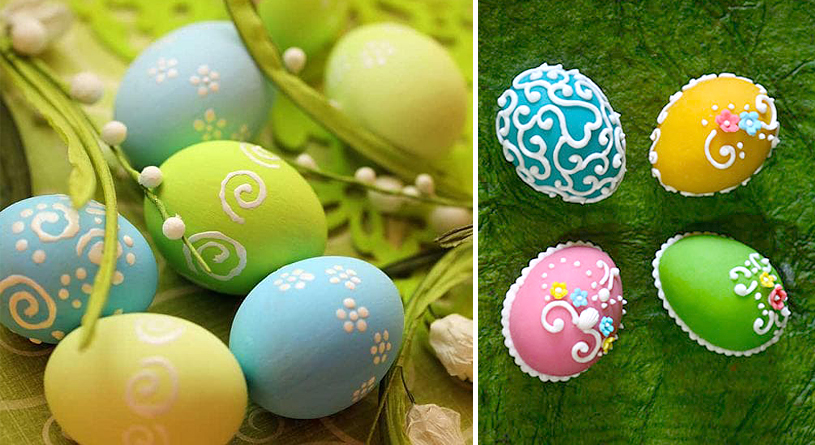
Sugar will help to diversify and make traditional Easter eggs more stylish. Unusual patterns, printed texture makes the eggshell irresistible.
- We paint in the standard way, using various dyes.
- Glass powdered sugar mix with a small volume of water so that a rather thick consistency is formed. The resulting mass should be homogeneous, that is, do not contain lumps. If there is no icing sugar, it can easily be made independently; for this, sugar (it should be more than a glass) is enough to be placed in a coffee grinder. The quality of the powder is not inferior to the store.
- In a pastry syringe recruit sugar solution.
- Apply the pattern and let the solution harden.
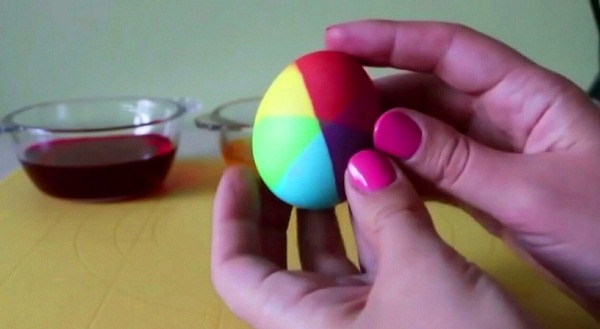
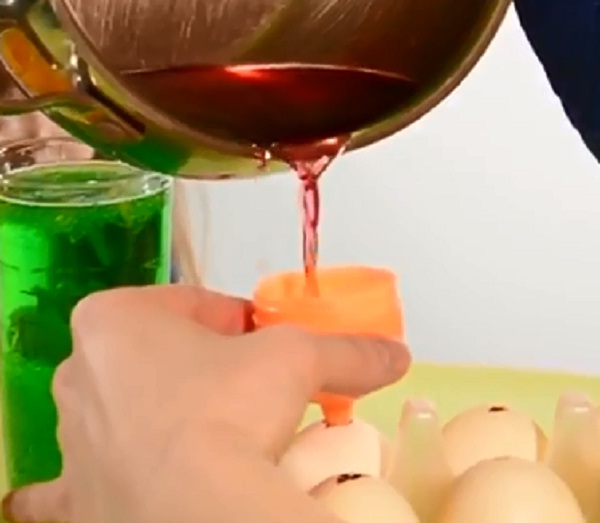
Fifteenth: Rainbow Eggs and the Power of Flowers
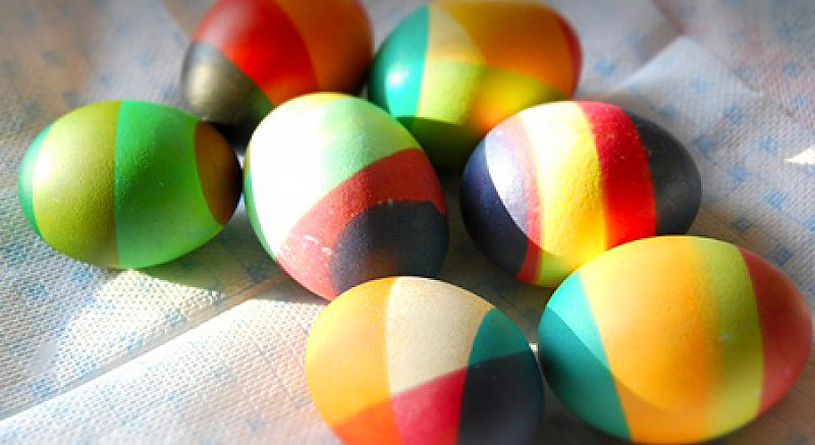
Brightness and juiciness, individuality and originality - that is inherent in Krashenkam, painted by this technology. Be sure that each egg is original, so the probability of having exclusive Easter eggs on the table is 100%.
- Boil eggs, surely hard boiled.
- Cool (it is desirable that the eggs were warm, then the process of applying paint will be more efficient).
- In separate containers dilute the paint you have chosen according to the instructions. It is desirable that the colors were in contrasting colors.
- Be sure to add to each of the containers of 2 tablespoons of vinegar.
- Stir.
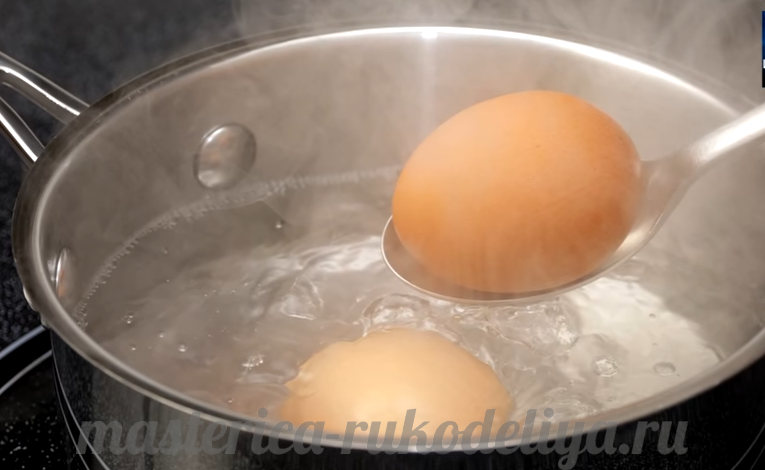
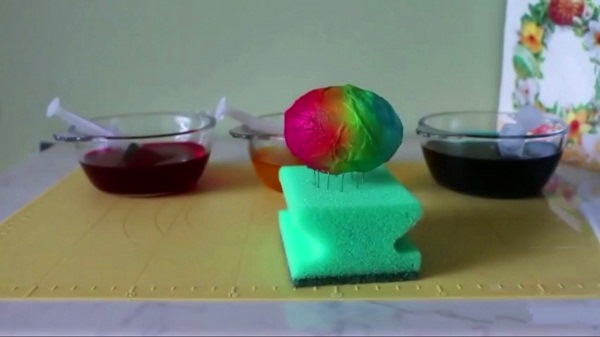
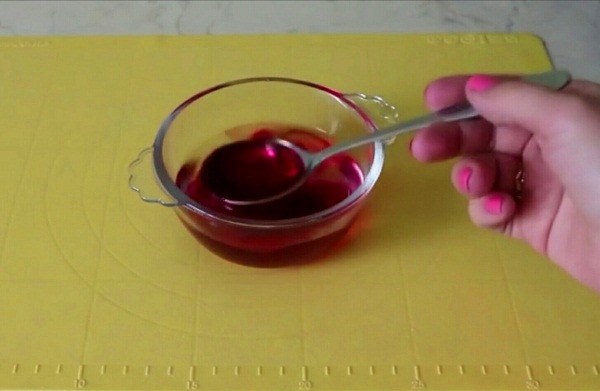
- Dip each of the eggs in a container of paint, carefully holding it with a spoon.
- Leave them in solution for a while. This will allow you to achieve an even distribution of the paint.
- Take out the already painted objects and let them dry off, leaving to dry on a paper towel.
- Take a painted egg with your fingers (you can use tweezers) and dip it in another paint, but do not dip it completely, but only up to half.
- Keep it in the paint solution for a minute. It is important that the paint has time to take to the shell.
- Remove and dry thoroughly on a towel out of paper.
Such a sequence can be carried out several times, changing only the colorful solutions.
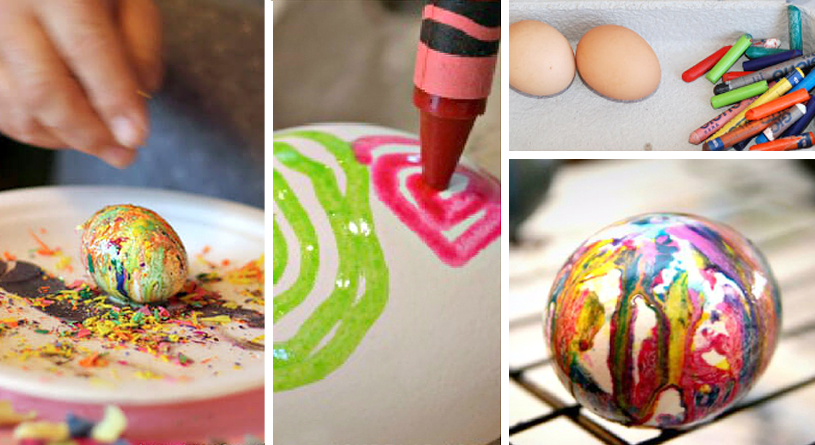
Sixteenth: wax crayons
With the help of ordinary wax crayons for children's creativity, you can paint Easter eggs with all the colors of the rainbow. And also put on them a white (lace) pattern.
How to get a colored picture on a natural background:
- Boil eggs in clear water with salt. The color of the shell can be anything, since it will be hidden under a layer of opaque wax.
- Once ready, dry the shell and place the eggs on special stands. Instead of coasters, you can use caps from plastic bottles.
- Until the testicles have cooled, paint them with colored chalk. In contact with a hot surface, the wax melts and forms freakish, bright patterns with color transitions on the shell.
You can also rub the pencils on a fine grater and sprinkle with freshly boiled eggs. Wax grains will create an unusual speckled or cosmic pattern on them. By the way, some housewives melt the wax crumb in a water bath and dip the testicles into a liquid dye. Or apply a drawing with a brush.
How to get a white pattern on a colored background:
- Rinse raw eggs with running water and rinse with soapy water (this way the paint will be smoother).
- Drain the shells with a towel. Put on her drawing with wax pencils (the color of pencils does not matter).
- Put the eggs into a solution of any dye and cook. When cooking, the wax will melt and go into the water, and the places that were under it will remain unpainted.
- After removing from the fire, immediately remove the krashenki from the solution.
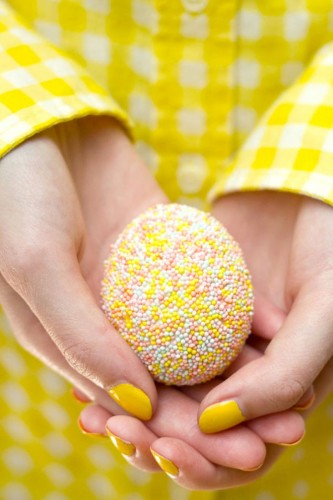
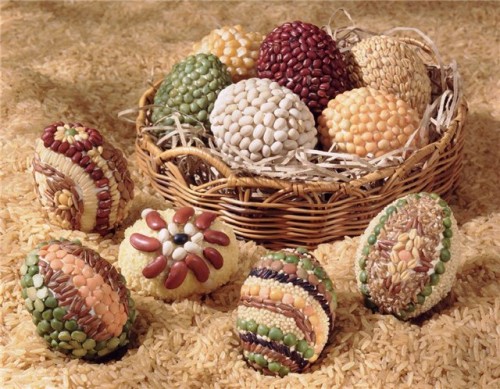
Seventeenth: candle, cereals, confectionery dressing
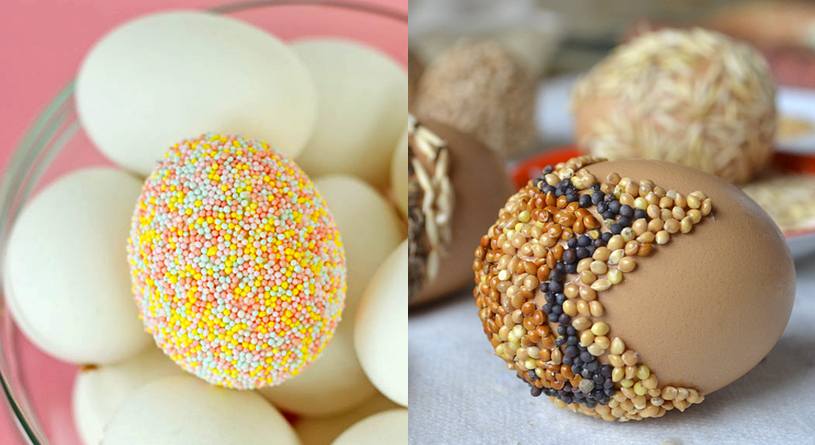
Decoration easter eggs can be the most common groats - rice, millet, buckwheat, peas, lentils, ground corn. And also - confectionary dressing from colored glaze or chocolate, small noodles in the form of asterisks and even beads. To fix all this on the shell, you need a wax or paraffin candle.
- Cook the eggs. You can pre-paint them in any way or leave natural.
- After cooling down, take the egg in your hands, light a candle and apply a pattern of melted paraffin or wax on the shell. This will be an adhesive base. Try not to touch the egg with flame, so that it does not have soot.
- While the wax is not frozen, roll the egg in a croup (sprinkle) or lay the pattern with your hands.
- After solidification, grease the surface, covered with croup, vegetable oil, so that it shines. From this egg will look more elegant.
Eighteenth: Cocoa and Eyes
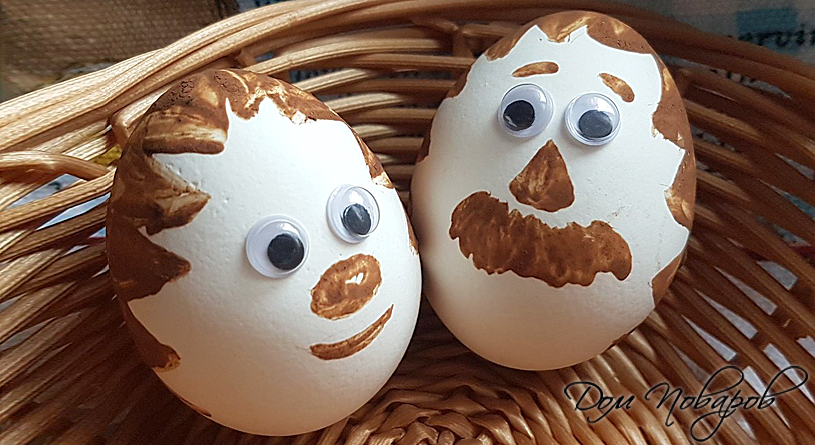
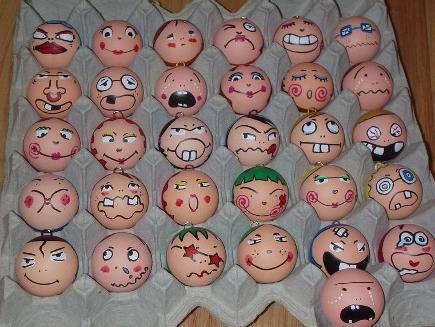
Together with the children you can decorate eggs with diluted cocoa powder and decorative stickers, it will be very original and unusual. You can draw anything: faces, faces of animals or insects.
- Cook chicken eggs until ready: 10-15 minutes. Cool slightly in cold water.
- In a small container, put a tablespoon of cocoa and dilute it with warm water to the state of sour cream.
- With a brush, apply a pattern on a warm egg, place it on a dry surface with the painted side up, the chocolate pattern should dry.
- Glue decorative eyes (they are sold in stores for needlework). Stickers can be on a sticky basis or without, then use glue PVA.
Here are some interesting and original answers to the question, what color eggs for Easter. Traditionally, the hostesses are doing this on Pure Thursday. Easter is a wonderful Christian holiday, giving wings and hope for a better life. He comes to us in the spring, like the first timid sunshine. Give the eggs a little time and let in a bright spring holiday.
Lose weight in the usual ways - hard?
Why persistent sitting on diets DOES NOT bring visible result, but leads only to frustration and depression, and how to lose weight in order to:
- Return the attention of her husband or find a new man.
- Feel the envious glances of girlfriends and colleagues again.
- Believe in yourself, feel slim and desirable.
- Do not hesitate to go to the cinema or in a cafe with friends.
- Do not hesitate to post photos from the rest or with children in social networks.
Burn fat specifically in problem areas
Easter - light and pure celebration of all believers. At Easter, it is customary to bake cakes, to give to relatives, and also to paint eggs. Easter eggs and painting eggs for Easter is a traditional family tradition.
In this article you will learn why eggs are painted for Easter, how to paint eggs with natural dyes, how beautiful it is to decorate them with your own hands.
Why do they paint eggs for Easter
According to church canons, eggs are painted on Pure Thursday, on this day it is customary to clean the houses, wash themselves and cut their hair. Painted eggs for holiday table eat first. Also, colored eggs are usually presented to each other, because they represent a talisman. By tradition, Easter eggs are distributed to the poor and brought to church.
How to paint eggs for Easter
Nowadays, on the eve of Easter, there are many food dyes, films, glitters, stickers and other items for decoration on the counters
There are also ordinary improvised means for this purpose, these are natural products: onion peel, beet juice, red cabbage juice. Let's discuss in more detail all the options for natural dyes:
- Onion Husk Peel the husks off a few bulbs, pour water over it, put to simmer for 40 minutes. Strain the broth and boil eggs in it for 10 minutes after boiling water. The color of the eggshell will turn yellow-brown.
- Nettle or brilliant green. If you want green colored eggs, boil them in a saucepan with nettles. Nettle can be dried. Green eggs can be obtained by holding them, already cooked, in Zelenka.
- Turmeric and violet. If you want a beautiful golden tint of shell, add turmeric dressing to the eggs where the eggs will cook.
- Shell walnut. If you cook eggs together with walnut shells, they will turn out to be a beautiful beige color.
- Coffee. Shells can be obtained if you make coffee, and then hold an already boiled egg in the broth.
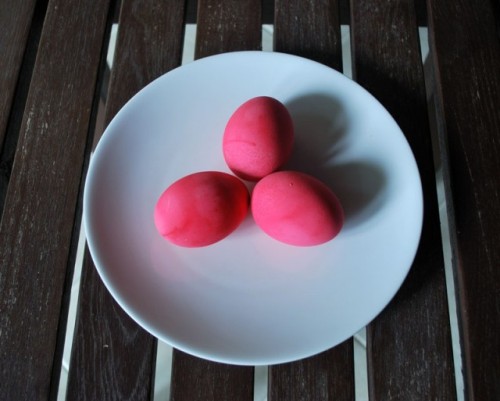
- Beet juice. You will get a glamorous pink egg with these products. To do this, boil the beets and add vinegar. Then put the eggs in a decoction and boil them.
- Cranberry. Rinse the berries, squeeze out the juice, and boil eggs in the juice.
- Carrot Juice Peel carrots, squeeze juice, boil eggs in juice.
- Hibiscus teaIf you boil your eggs with hibiscus tea, you will achieve a pink shell.
- Mint. Cooked with mint eggs will be pistachio hue.
Natural dyes are good because they are harmless to humans.
You can adjust the brightness of eggshell, if you want to get a brighter color, do not remove the eggs from the broth until the water has cooled.
Carefully remove the painted eggs and water and put to cool on a plate. You can leave the eggs monotonous, and you can do their further decor.
If you use artificial dyes, do not use an egg as a food, it is better to pre-blow the egg out of the shell, so it will please your eye as a souvenir.
Tip: before painting eggs, they need to be washed and degreased with alcohol, the paint will fall evenly.
After dyeing the eggs, coat the shell with a cotton swab dipped in vegetable oil, the eggs will shine beautifully and become brighter.
Tip: To prevent the egg from cracking, add a teaspoon of salt to the solution.
Three ways to originally paint eggs video
The text was prepared by: Veronica
Since ancient times, people exchange eggs and Easter cakes for the Easter holiday. The tradition has been taking shape for many years, as a result of which many ways of coloring and decorating merchandise have appeared. With the words “Christ is risen!” Men and women, children and the older generation exchange eggs, later considering intricate patterns. Among other things, coloring eggs is quite an exciting process, able to rally the household. There are basic ways to consider them in more detail.
How to prepare eggs for painting
As mentioned earlier, experienced housewives, through trial and error, identified the main variants of egg coloring at Easter. However, regardless of the method chosen, they must first be prepared.
- A few hours before the intended staining, remove the eggs from the refrigerator and leave at room temperature. Such a move will help avoid temperature drops, because of which the shell cracks. An alternative is the puncture of the shell with a thin sewing needle that will not allow the eggs to burst.
- If food pigments or onion peels are used as the primary staining method, it is recommended to wash the shells beforehand. To do this, use the kitchen sponge and soda. As a result, the paint will fall smoothly without streaks and blotchy patches.
- Before starting the procedure, degrease the shell, wiping it with vodka or medical alcohol. If neither is available, clean the surface with soapy water, then rinse thoroughly and dry.
- To paint the shells after dyeing, rub the surface of the eggs with vegetable or corn oil. Do not use cotton pads for this purpose, gently moisten the fingers in the composition, then spread it over the shell.
When you have prepared the "material", proceed to painting. Choose the best option for yourself, then follow the instructions carefully.
Method number 1. Food colorings
Food dyes are rightly considered the most common type of coloring of Easter eggs. You can buy ready-made colors or display your own shades. Pigments can be pearlescent, glossy or matte, it all depends on the manufacturer.
To properly prepare the composition, in advance, take care of such a number of containers, so that each color has a separate bowl. Dilute the paint with water at room temperature, there should be a lot of liquid so that the eggs in it completely drown.
After dilution of the paint, pour in 30 ml. table vinegar solution, then send the cooked or raw eggs in the bowl. The duration of exposure varies, it all depends on what intensity you want to get a shade.
Stencil
- Purchase tracing paper on the Internet or in an office store - ultrathin paper. Cut out any stencil-shaped image from it (the inside is removed). Anything can be used as a picture: favorite cartoon characters, Easter themes, Jesus Christ, etc.
- A screenshot can be downloaded from the Internet. The final result depends on the quality of the original image and the material itself. When you make a stencil base, namely print and cut it out, moisten the paper in room temperature water. The material should become elastic, repeating the shape of the egg.
- Attach the stencil to the shell, smooth out the creases. If your drawing is small, duplicate it in several places. Fix the stencil with gauze or a piece of nylon stockings (pantyhose).
- Dissolve food or natural dye, send eggs to it and boil them until ready. Upon completion of the procedure, remove the eggs, put them on a toothpick or newspaper, cool to room temperature. Once this happens, remove the gauze and stencil, enjoy the result.
Vegetable oil
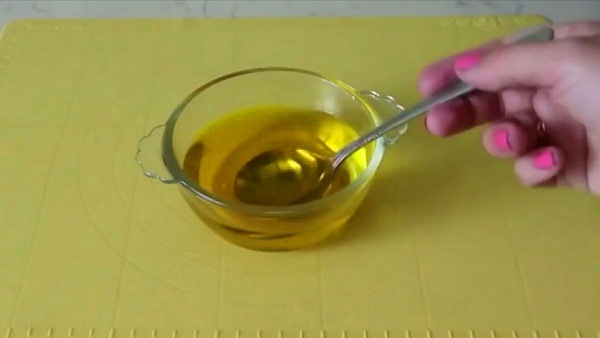
- A beautiful result is achieved as a result of coloring eggs with the addition of vegetable oil. To properly perform the procedure, prepare two containers with the same shade. In the first pour oil, and leave the second unchanged.
- Cook the hard-boiled eggs, cool to a temperature of 30 degrees (the same figure should be the color composition). Lower the "material" into a bowl of paint, wait for the required interval (the exact time is specified in the instructions).
- After that, remove the eggs, leave the paint to dry. When this happens, send the product to the second container with vegetable oil, wait again for the time. Dry eggs, evaluate the result.
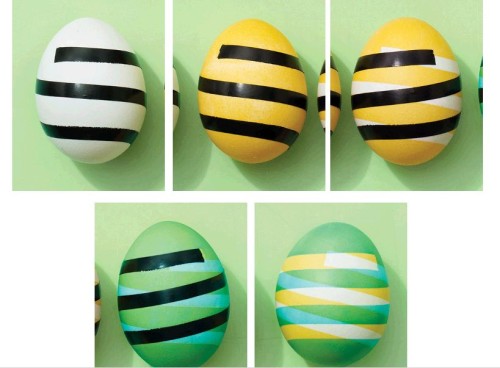
Insulating tape
- Cut the tape along to get thin strips (you can skip this step if you want). Prepare several containers with diluted paint, preferably choose blue and yellow colors.
- Stick a strip in the form of a spiral or any other pattern at your discretion. Put the eggs in a bowl with blue, wait for a while, get out and wait until it dries. Remove the electrical tape.
- Now glue the following strips, which will slightly cover the previously obtained pattern. Lower the egg into the yellow paint, wait for the interval, remove and dry.
- In the end, you get an egg of yellow color with blue and green stripes. The variant is good because it allows you to experiment with obtaining new shades by applying one color to another.
Stationery erasers
- Get in the stationery store gum, which usually pull the banknotes (silicone base). Cook the hard-boiled eggs, cool, prepare the paint for one or several shades.
- Then you can do two things. The first involves coloring the egg in any color with prominent white lines (the gums are attached to a previously unpainted egg). The second option is a two-phase color, resulting in the lines obtained in the color in which the egg was originally painted.
- Consider the second option, it is more complicated. Paint the egg in yellow, dry it. Wrap the clerical rubber bands in a chaotic order crosswise. Lower the "material" into the green paint, wait for the pigment to set. Dry, remove the gum. You will see that the egg has turned blue with yellow stripes.
Leaves of plants
The technique is similar to a stencil technique with just one refinement - the leaves are used as a drawing, most often in their role is parsley and dill.
- To get the exact result, tear off several leaves, attach them to the shell, fix with a gauze cloth or a nylon stocking. Dip in the paint, wait for a while.
- At the end of the period, take out the eggs, cool and dry them. Unfold the fixing material, remove the leaves, oil the surface with vegetable oil and enjoy the result.
- An alternative to the leaves can serve as the same tape, self-adhesive paper or scotch tape. Cut out the material you need from the material, attach the pre-cooked egg to the skim shell. Place the product in a bowl with a pigment, then remove and dry.
Method number 2. Natural dyes

- As natural dyes, onion peel, beets, turmeric, carrots, birch leaves, calendula, orange or lemon, spinach, red cabbage, nettle, coffee can act.
- The main feature of "folk" staining is considered to be that the composition is acting slowly. As a rule, it takes about 8-10 hours to get the result.
- To prepare the solution, pour water into the pan and add a large number of selected dye. Pour in 35 ml. table vinegar, stir. Bring the solution to the appearance of the first bubbles, then lower the power and boil for another 15 minutes.
- When the paint is ready, insist on it for about half an hour, then send it to the egg container and simmer them over a slow fire for 25 minutes. Then turn off the hotplate, leave the product in solution for the whole night.
Turmeric
To give the eggs a seductive golden hue, use ground turmeric.
- Boil the water in an enamel saucepan, put in 90 gr. turmeric, bring to a boil. Put the raw eggs in the bowl, cook until ready, then let it sit for another 8 hours without taking it out.
- It is recommended to carry out the procedure with extreme caution, since turmeric is difficult to remove from the surface of furniture and clothing, however, like other natural dyes.
Red cabbage
Decoction on the basis of cabbage will give the eggs a rich blue tint.
- Grind the whole head in small slices, place in a saucepan and pour boiling water. Add 180 ml. table vinegar solution, cover and insist for 10 hours.
- After the expiry date, send to the egg container, monitor the intensity of the color every 2 hours. Then remove the product and leave it to dry. If desired, paint the surface with gouache or felt-tip pens.
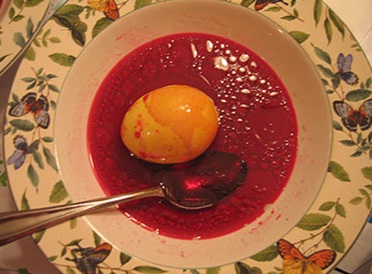
Beet
Beets will help to color eggs in a crimson or pinkish tint, it all depends on the duration of exposure of the product in solution.
- Rub on 4 graters medium-sized beets, then mash the resulting composition with a cracker for potatoes or grind in a blender.
- Pour the finished mixture with steep boiling water so that the water covers the beet completely. Pour in 150 ml. vinegar concentration of 9%, wait 6 hours.
- Put the boiled eggs in a saucepan, let it brew for 5 hours. After the time has elapsed, remove the product, allow it to dry.
Onion husk
Onion husks color the eggs in a red-brown shade with a bronze tint
- To prepare a color solution you will need to take a husk of 4 kg. Luke. Raw materials must be sent to a large saucepan and poured with steep boiling water.
- Put the container on the stove, bring the mass to a boil and simmer for 1 hour. After this, cover, leave to infuse for 24 hours.
- After the due date, pass the broth through a colander or gauze, cook the eggs in it for about 10 minutes. Then do not remove the product from the pan, leave until the liquid is completely cool.
Regardless of the chosen method of coloring, you can create patterns on Easter eggs using improvised materials.
- Cook round-grain or long-grain rice, moisten the egg in water and roll it in rice so that the grains are stuck. Tie up a stocking or gauze, fix on both sides with elastic bands.
- Prepare the coloring pigment, dip the eggs into it and wait for the necessary time. For this method, natural dyes are better.
- When the eggs are stained, remove them and leave until completely dry. Remove the fabric, remove the rice, brush the surface of the shell with sunflower oil.
Silk fabric
Eggs can be dyed with fabrics, silk or cotton with the already existing patterns is ideal for these purposes.
- Dampen the egg in hot water, wrap the cloth with a piece of cloth, so that the figure is flush with the front side of the shell surface. Sew the egg with threads around the perimeter so that the fabric does not slip.
- Wrap a piece of nylon, tie it from two sides, creating a kind of candy. Pour into an enamel saucepan 100 ml. vinegar (6%), add water, send to the egg. Cook them for about 15 minutes, then turn off the cooker.
- Give the eggs to stand in the solution for another quarter of an hour, then place them in a bowl of cold water and leave until completely cooled. Gently remove the clamp and stocking, evaluate the fruits of their labors.
To begin, prepare the eggs for painting: remove them from the refrigerator, leave at room temperature, puncture the shell thin hole sewing needle. Consider the option of staining with food or natural dyes. Use stencil, parsley leaves, silk fabric or handy materials to create a unique pattern.
Video: how to paint eggs for Easter (different ways)
Press Class
Tell the VC
Already very soon the brightest holiday of all Orthodox Christians will come - Bright Easter. I am sure that already now, many housewives begin to collect, a variety of rolls, curds, Easter cakes, pies and, of course, for staining eggs.
There are a lot of ways to paint eggs for Easter. It is to this topic that I want to dedicate today's article. If you decide to paint beautifully and unusually eggs, then this post is for you. Here I tried to collect the most interesting and original, in my opinion, ways on the question posed.
Lesson is quite interesting, and most importantly, that this process is very popular with children. As I remember now, as a child, when my mother painted eggs on Easter, my sister and I also took part in it. Although at that time there were no various colors, and there was a standard set of colors, but still we really liked the final result.
And now you can buy a variety of colors and shades, right up to the pearly. But natural natural dyes, too, have not been canceled, and they must be taken into account. And if you include fantasy, you can get very beautiful eggs that will decorate your presence with a festive table.
Ways of painting eggs with your own hands:
Tips and secrets for the preparation and coloring of Easter eggs
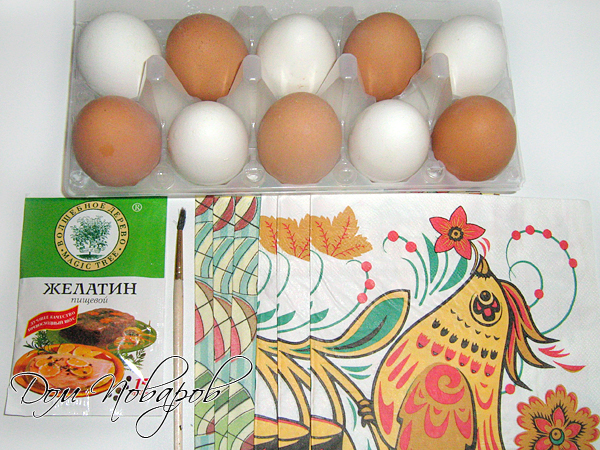
- For painting it is best to use white eggs.
- Before cooking eggs, soak them at room temperature for several hours. Most likely, that the shell until the end of cooking does not crack.
- It is necessary to add 1-2 tablespoons of salt to the water.
- If, before the most coloring, you rub the eggs with alcohol or soap solution, the paint will lie flat and the color will be more saturated.
- To give a shine to the colored eggs, after painting they should be well dried and rubbed with vegetable oil.
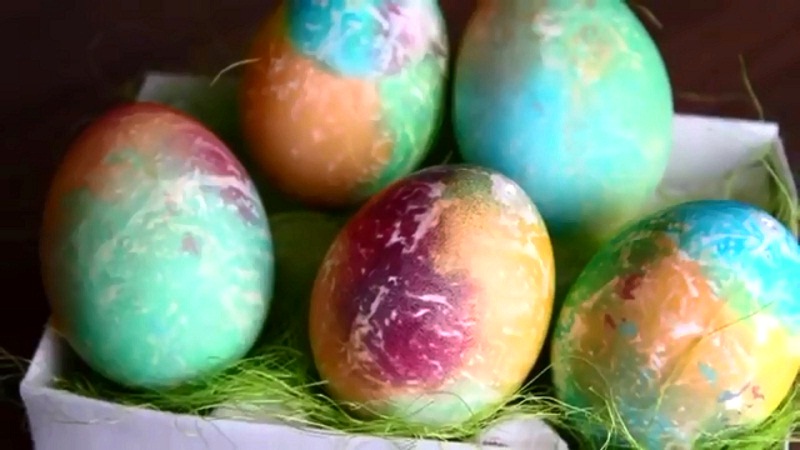
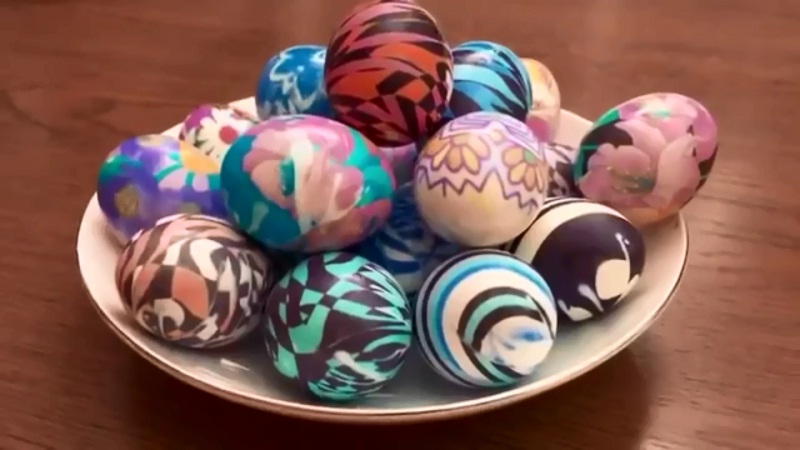
Easter eggs - marble color with napkins
Painting the eggs in this way you will get a very beautiful, marble, rainbow pattern. Everything is done fairly simply, and the result is simply amazing.
We will need:
- boiled eggs
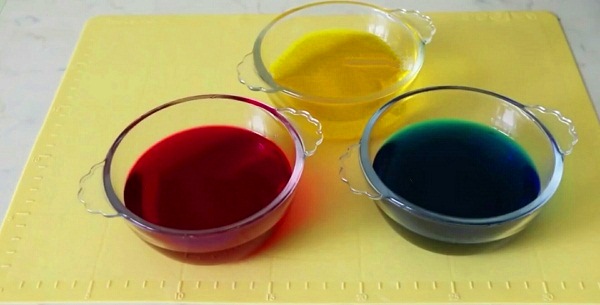
- food colors - yellow, red and blue
- paper napkins
- medical syringe - 3 pcs.
How to color:
We raise 3 colors of liquid dyes (yellow, red and blue) in hot water. Follow the instructions given on the package, as the colors are different and each has its own ratio of liquid to color.
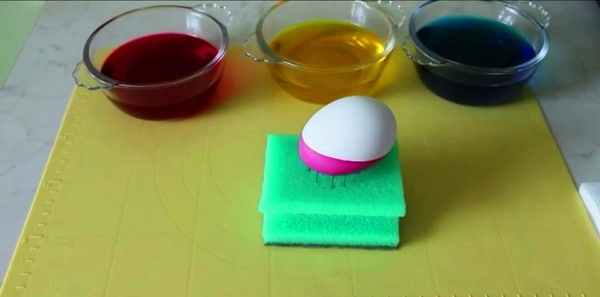
Welded egg wrapped in a disposable napkin.
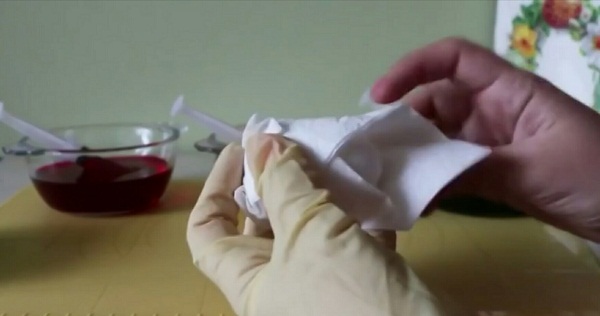
Advice! Wear rubber gloves to avoid staining your hands during dyeing.
Using a syringe alternately apply the paint on the egg. If you do not have a syringe, you can replace it with a regular teaspoon.
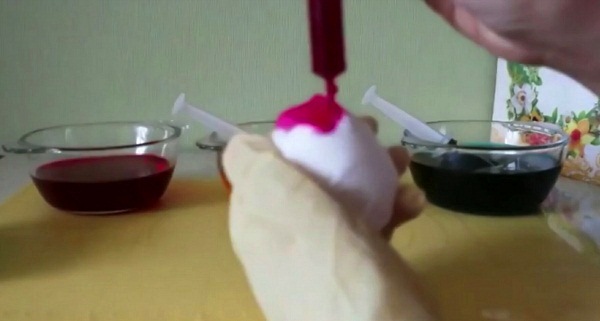

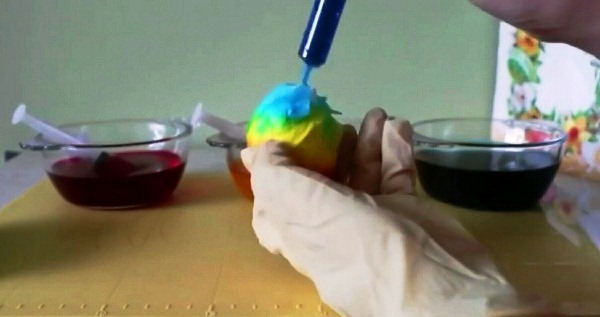
After applying the dye, you need to tightly press the napkin to the shell.
Leave the egg for better staining for 10 minutes.
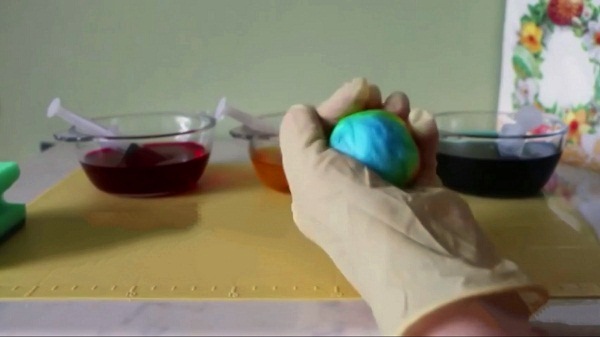
Unfold and admire the result. In order for the Easter eggs to shine, grease them with vegetable oil with cotton wool.
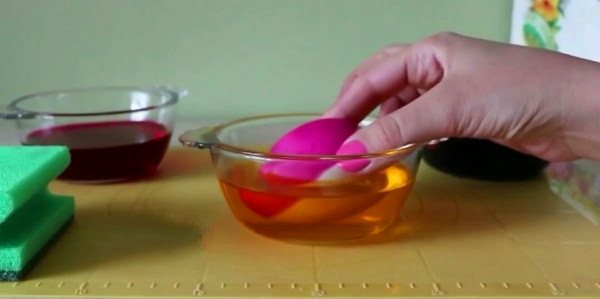
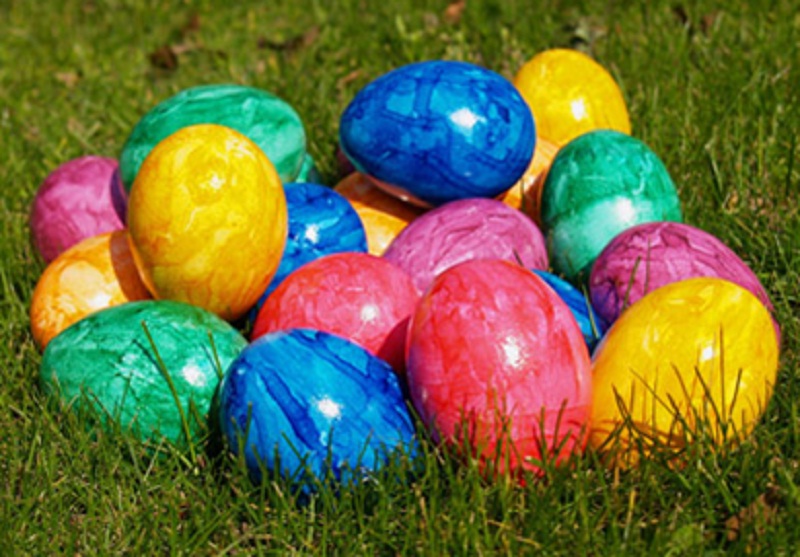
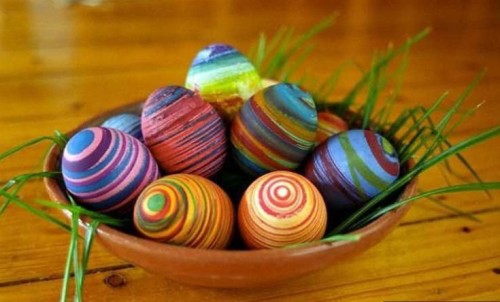
Rainbow Eggs
Having painted eggs by this method, they will get an iridescent coloring. A great way that does not take long and will please your eye with all the colors of the rainbow.
What do you need:
- boiled eggs
- food colorings
Method of staining:
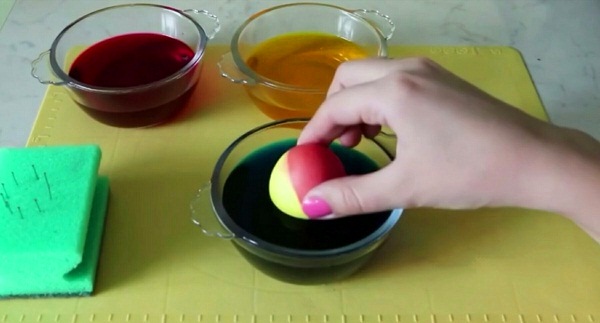
Just like in the previous method, in separate bowls we breed 3 colors of dyes - blue, red and yellow.
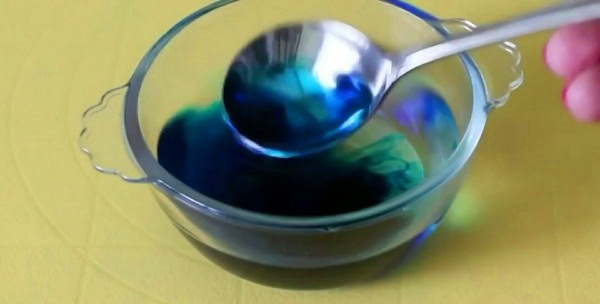
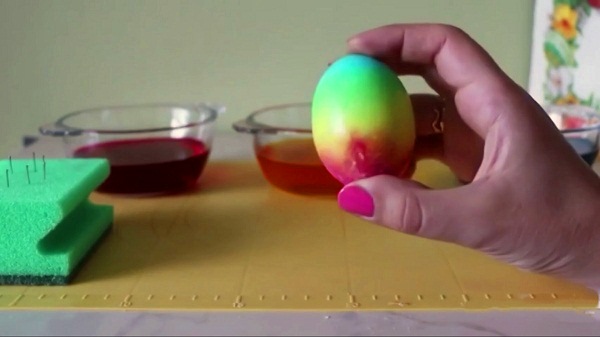
First, we lower the part of the egg into a red dye and hold for 2-3 minutes. Let's dry it.
We repeat the procedure with a yellow dye.
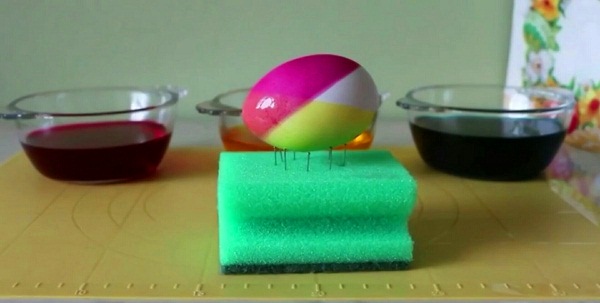
The final step will be blue paint.
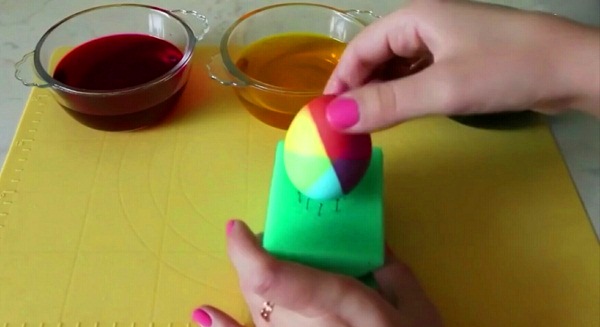
The first and second methods can be done simultaneously. And in the end, you will get such beautiful Easter eggs that perfectly decorate the festive table.

How to beautifully paint eggs with nail polish
Very beautifully, Easter eggs are obtained, if you use normal nail polish for staining. Look at what beauty turns out.
It will take:
- capacity with water
- nail polish (different colors)
- eggs (cooked)
Staining procedure:
For this method of painting is not superfluous to use rubber gloves.
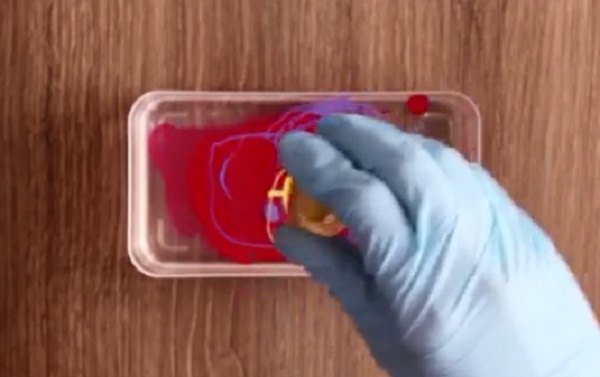
Here are such beautiful, with a marble tint, eggs are obtained, with the help of a usual varnish. Simply and easily.
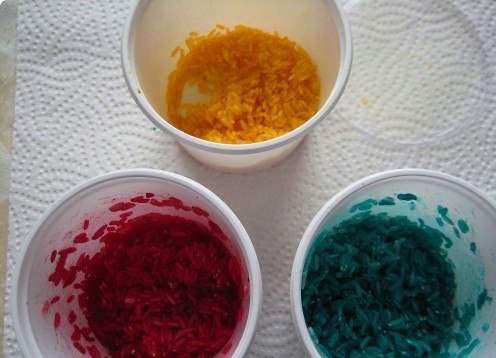
We paint in speck using rice
Get incredibly beautiful testicles very easily, using ordinary rice. The most important thing is that by applying this method and experimenting you can get a whole palette of various colors.
For this you need:
- liquid color of any color.
- plastic jars with rice
Preparation:
Pour into plastic jars Fig.
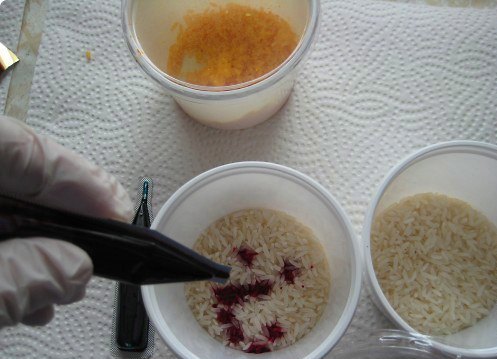
Pour a little dye and mix.
Put the boiled egg in a container with rice. Cover with a lid or a hand and shake it several times.
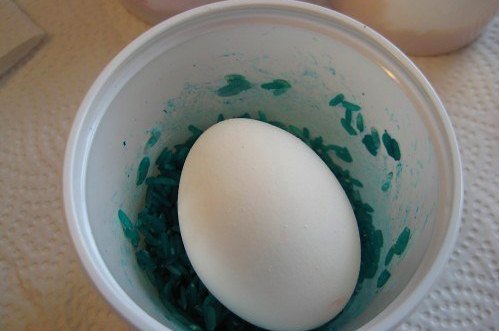
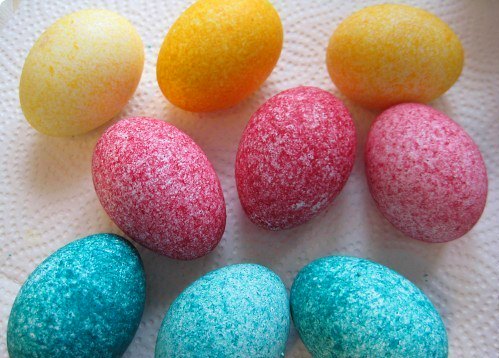
To obtain a multicolored speck, you need to repeat the procedure with the same egg, only with a different color.
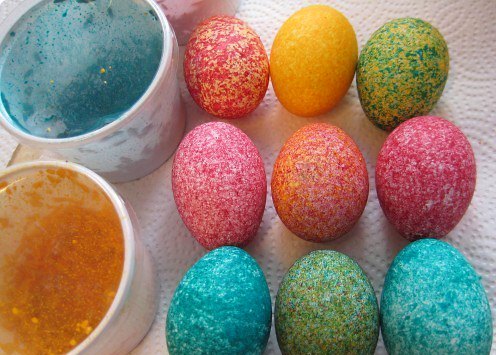
Experiment and share your results.
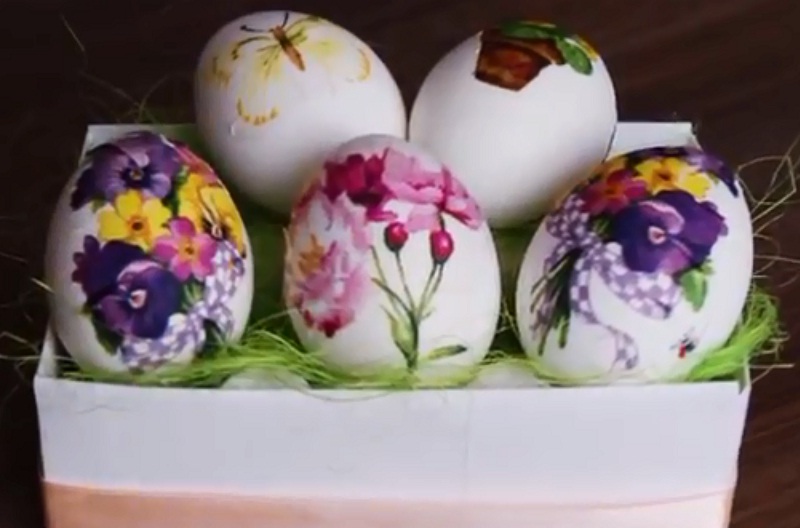
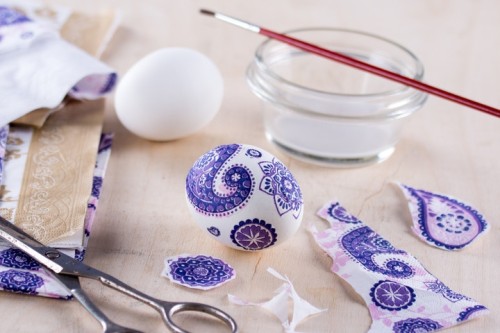
Decoupage of Easter eggs
The technique of decoupage means that we will glue ready-made eggs with stickers. As stickers we have colored napkins. Let's see what happens.
Necessary:
- colored napkins
- boiled chicken eggs
- egg white
How to:
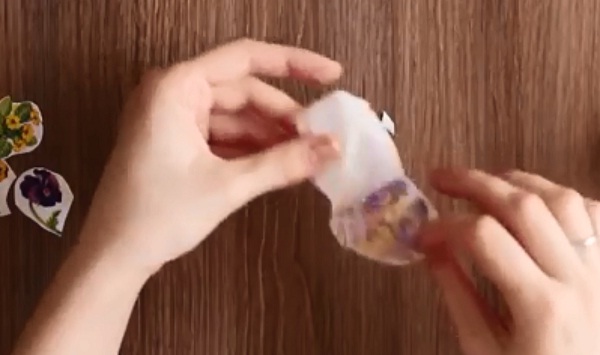
Separate the bottom layer from the napkin.
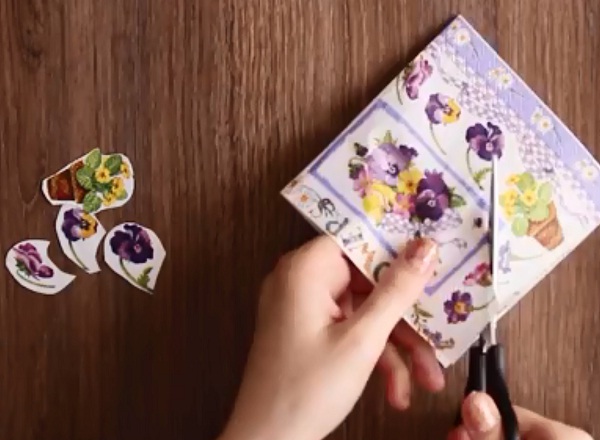
Cut out the pictures you like.
We smear the egg with protein with a brush. Attach a sticker.
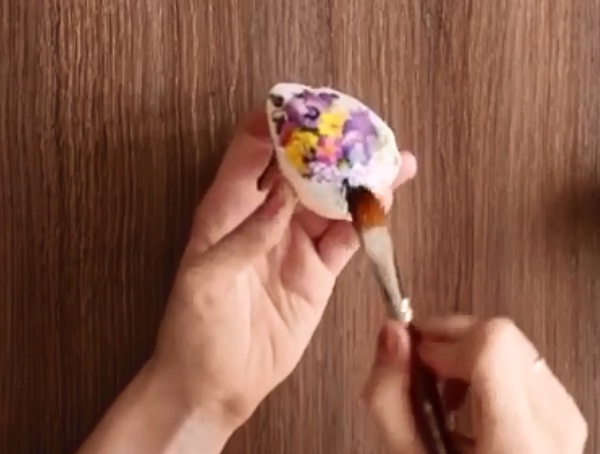
We spread the sticker on the whole surface.
As you can see, everything is quite simple. And the result is excellent.
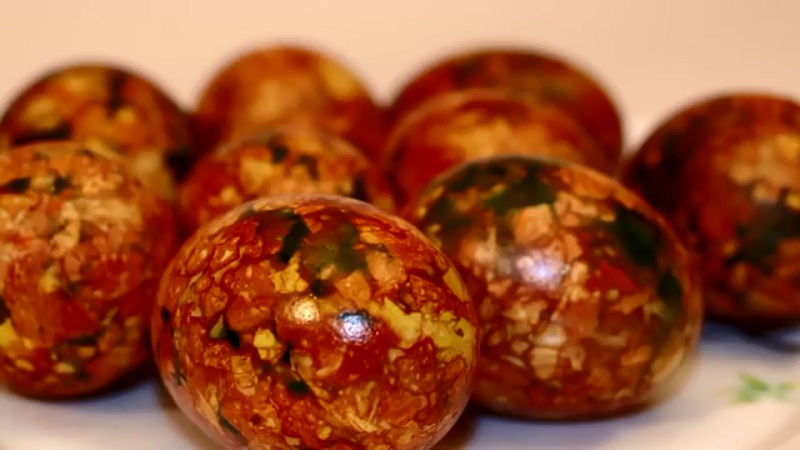
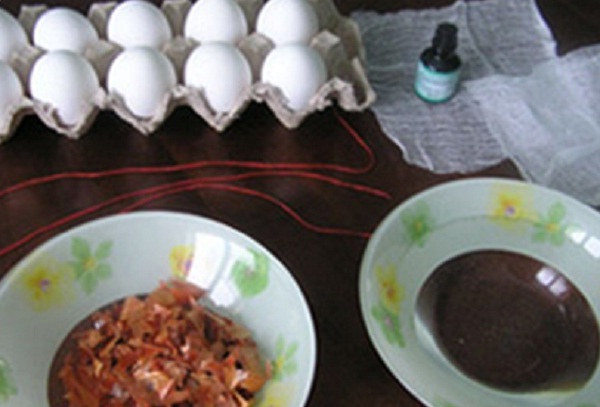
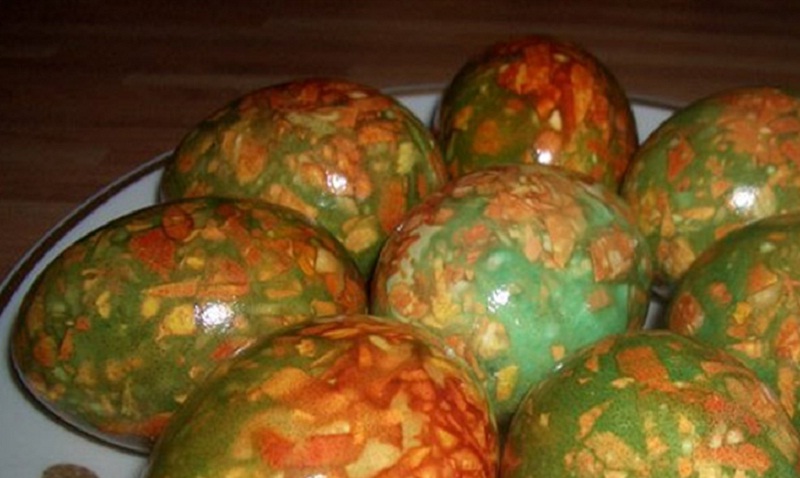
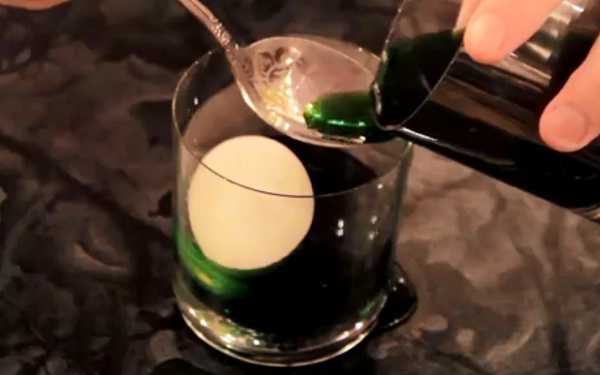
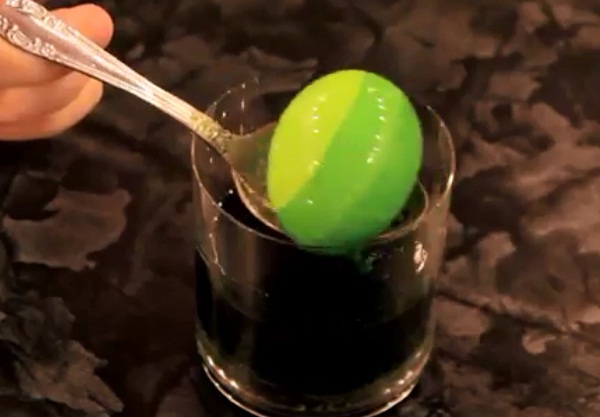
We paint eggs in onion husks with greens
Want an incredibly beautiful marble color Easter eggs. With this method it will be possible to achieve this result.
What do you need:
- Onion husks
- Raw eggs
- Zelenka - for 10 eggs 1 bottle
- Kapron (gauze, bandage)
Preparation:
How to paint in onion husk with a pattern
If you want to have an uncolored picture on the painted egg: whether it's a leaf or a heart, or anything else, this way is for you.
Take a leaf from any plant or cut out any figure from the paper.
Apply the stencil to the egg and tighten with nylon. Tie both ends with a thread or an elastic band.
Boil the eggs in the onion husks for 15-20 minutes. If you want a more saturated color, cook a little longer.
Extract the eggs from the pouches. Rinse with water.
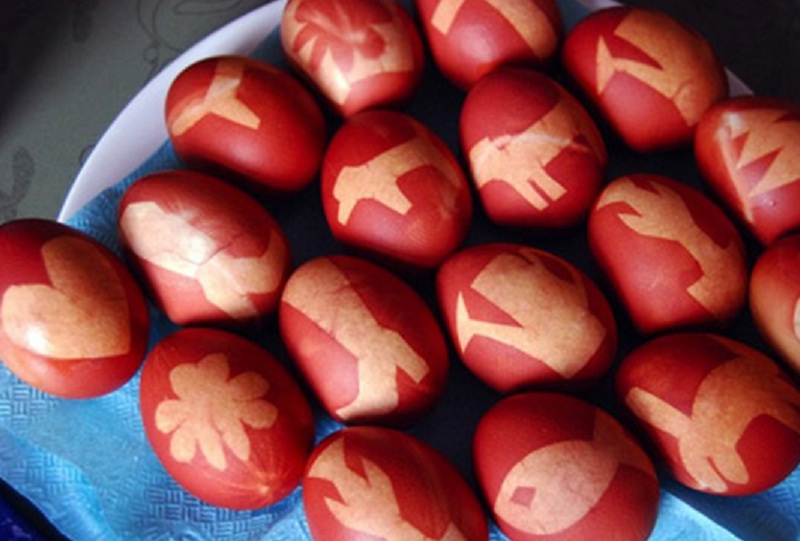
Here such here are obtained drawings. By the way, you can also do with dyes. Only you need to paint already boiled eggs, and the technology remains the same. Successful creativity!
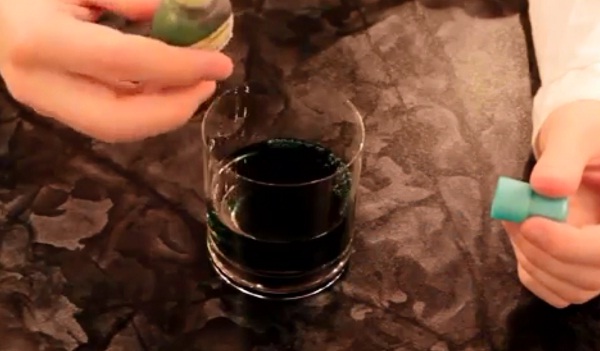
Striped Easter Eggs
I suggest one more unusual option for painting. Striped eggs are very unusual and elegant. Everyone will be interested in how you achieved such smooth transitions.
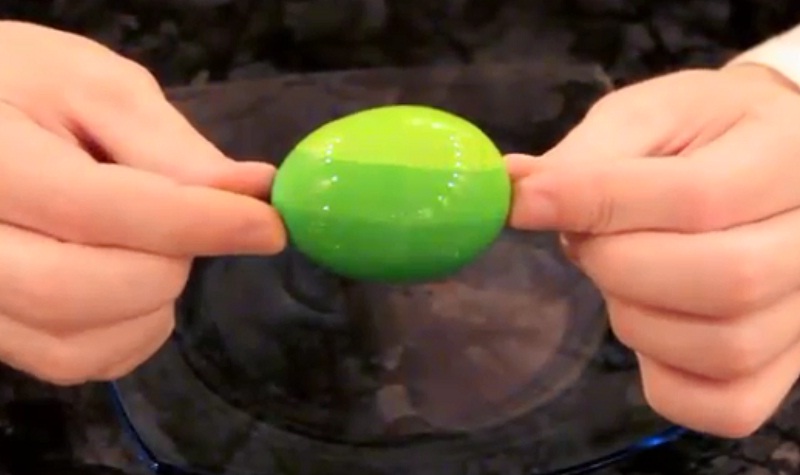
Any food coloring is diluted in 100 ml. hot water.
Place the egg in another glass and pour 1/3 of the paint on the vessel wall.
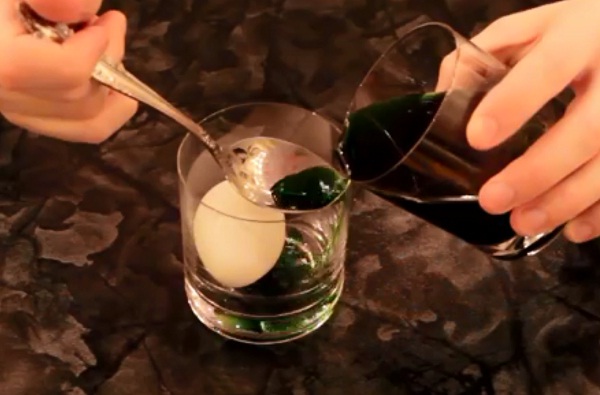
After 10 minutes, pour in another 1/3 of the liquid.
After 10 minutes, pour the remaining dye.

After 5 minutes, remove the colored egg.

Having done this with different colors you can get beautiful striped eggs to the Easter table. Time will take a lot of this process, but the final result, I think, is worth it.
How to paint eggs in rags without dyes
Eggs can be dyed without dyes. The proceeds come silk scraps. Excellent for this purpose suit men's ties.
How to color:
Raw eggs need to be wrapped in shreds of cloth colored side to the shell. Secure with an elastic band.
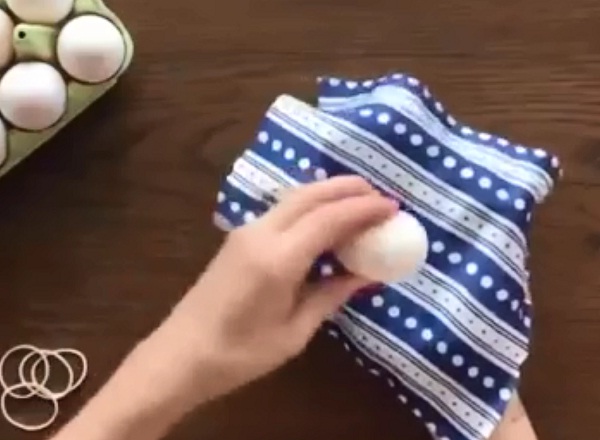
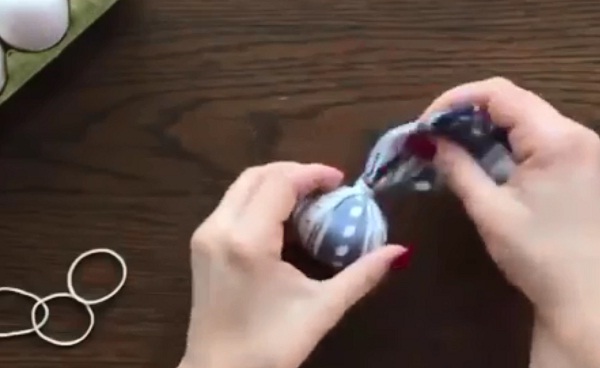
Top with a rag and bandaged tightly.
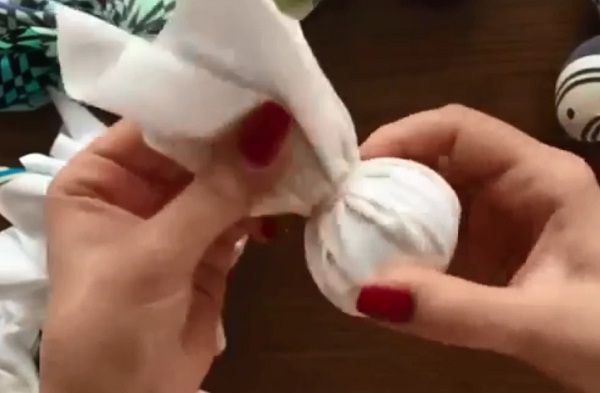
Put into a saucepan, add water, add 2 tablespoons of vinegar and cook for 20 minutes.
Cut the scraps. After complete drying, grease the eggs with vegetable oil.
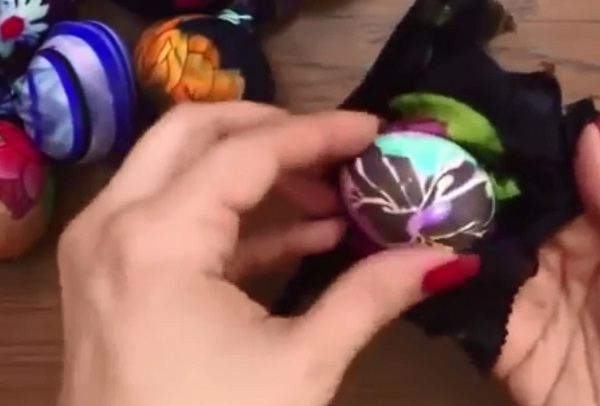
That's the whole procedure of painting without dyes. Just the truth?
Unusually beautiful "marble" Easter eggs
Another way to get "marble" eggs. He is as good as using onion husks with greens. It turns out a very amazing drawing.
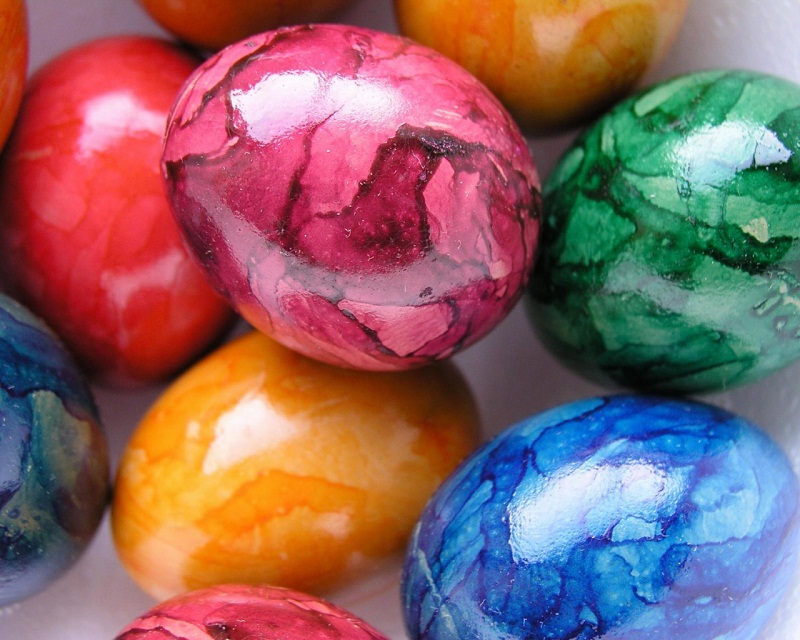
And this is done like this:
In water with a diluted dye you need to pour 0.5 tbsp. of vegetable oil and mix well.
Place ready-made eggs in the dye and try to catch as many oil droplets as possible on the surface of the egg. The more divorce is obtained, the more beautiful it will be in the end.
Dyed egg blot with a paper towel.
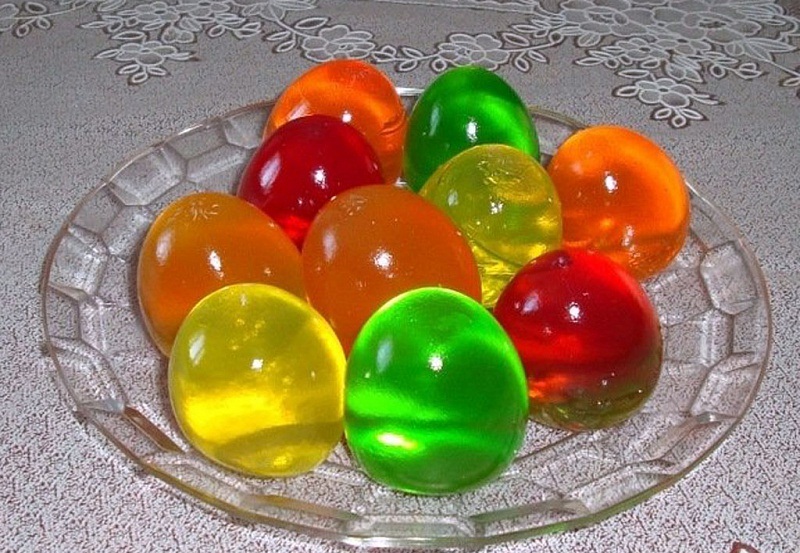
Jelly eggs - for the joy of children
Easter is a family holiday, and it's very good when all the household members take part in the preparation for the holiday. I bring to your attention eggs from jelly, in the preparation of which you can connect children.
What will be required:
- Any natural juice - for 200 gr.
- Gelatin
How to:
First we prepare eggs. We pierce the tip of the egg with a knife and pour the contents of the egg into a bowl. Eggs are quite useful for baking, so do not throw them away.
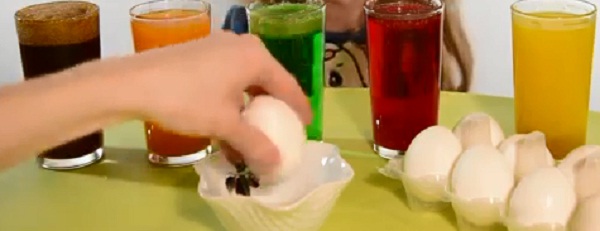
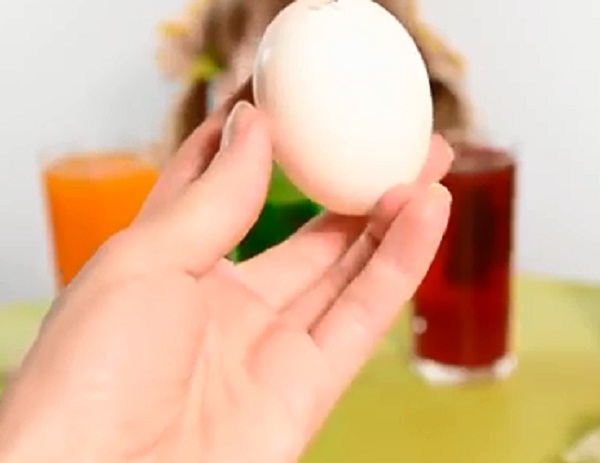
We wash the empty testicle with water until pure water flows from it.
Now you need to heat them in a preheated oven to 200 degrees for 10 minutes.
In a natural juice we pour 10 gr. gelatin and stir.
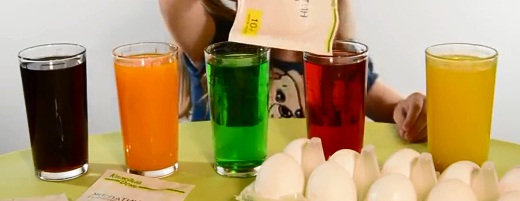
Using a small funnel, pour the juice into the cavity of the egg and leave it overnight until it is completely solidified.
We clean the shell and can use.
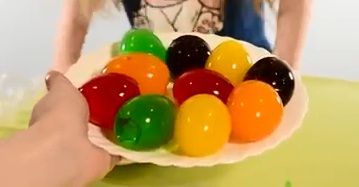
The children will be very happy with the jelly testicles, especially if they take them with you.
It used cherry juice, orange juice, coca-cola, juice from tangerines and tarragons.
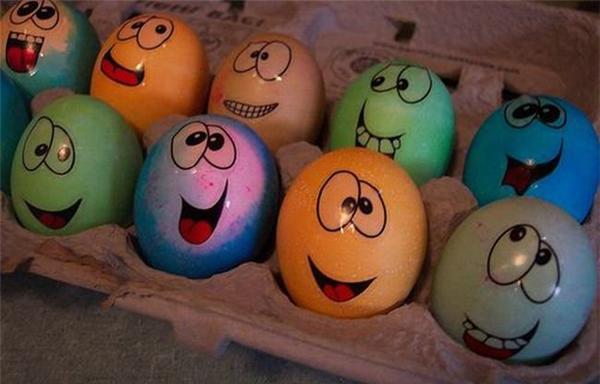
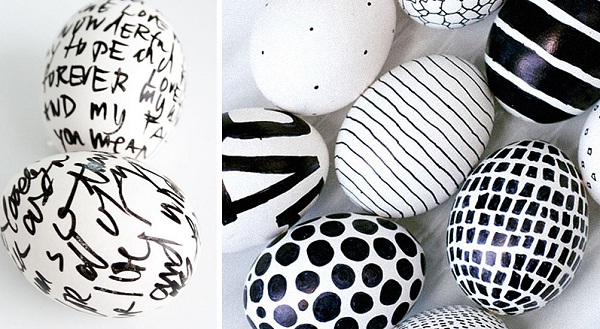
We draw on eggs with markers
And the last method for today is the drawings with a marker on the finished eggs. It all depends on your imagination. You can draw anything, anything. And here's a small selection for you.
Painting colored eggs in the style of "Angry Birds" (evil birds)
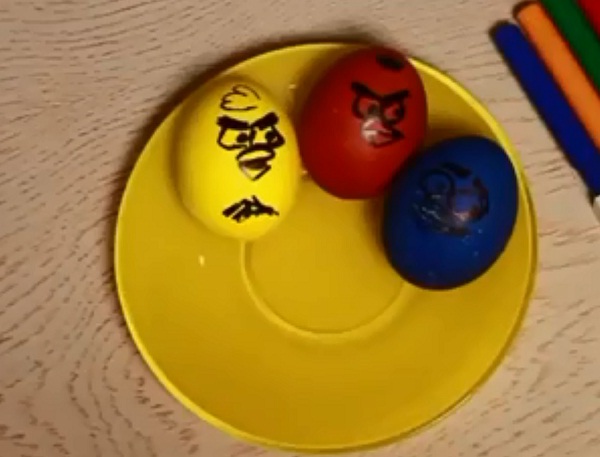
You can draw beautiful funny faces (smiles)
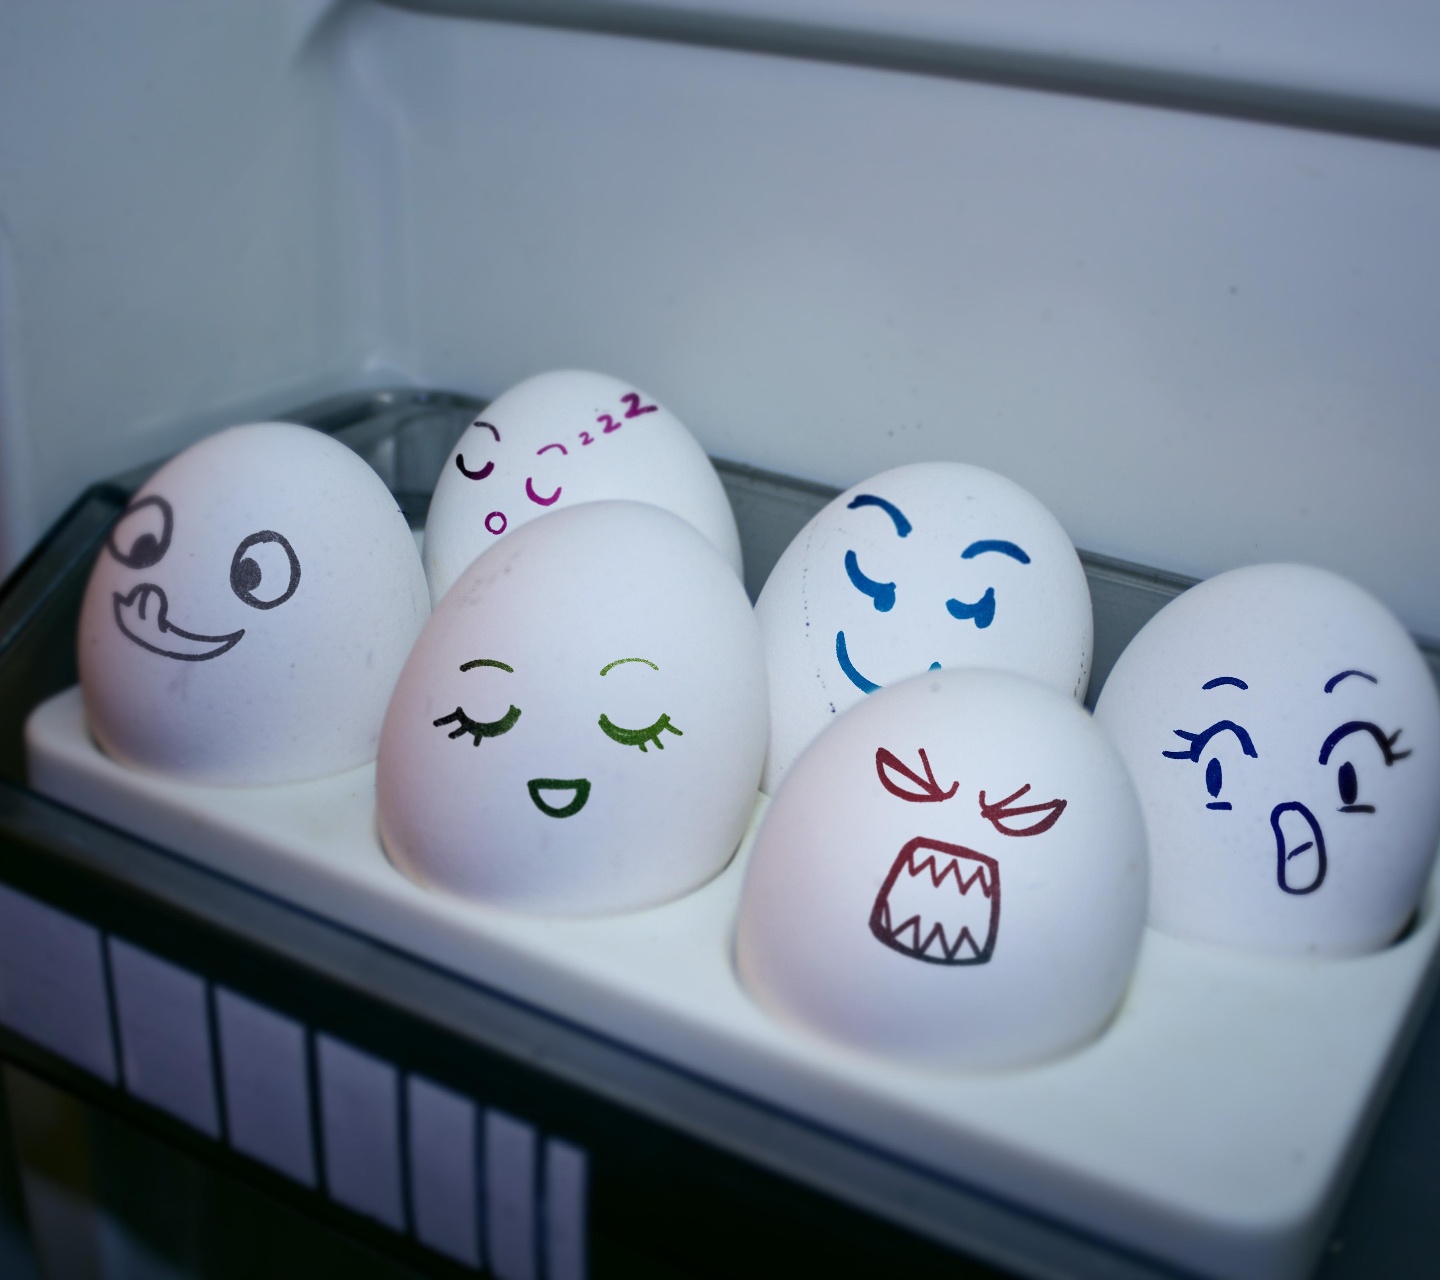
Or here such unusual patterns will look good too
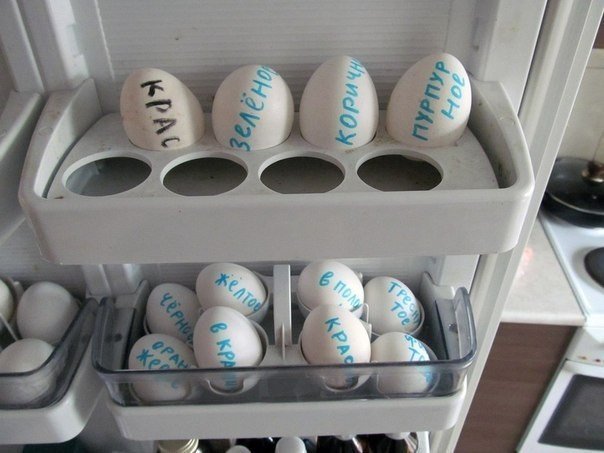
And if you really do not want to bother, you can just sign each egg the color you want)))
If you find the article useful and found something new for yourself, then clicking on the class you share it with your friends in social networks. Well, that's about it.
I congratulate you on the occasion of the Holy Easter! I wish you and your family all the best. Let your life be as bright and beautiful as the Easter eggs. Be healthy and happy. All the best! Till!
Tweet
Tell the VC
Easter has its own customs and traditions, one of which is the painting of eggs. The article will be useful to both adults and children. Easter eggs are a symbol of a great holiday. Mistresses are with awe of painting eggs, and many are eager to invent new patterns.
The tradition of painting eggs for Easter
There are several versions of the emergence of such a tradition.
Version 1.
When Jesus was resurrected, Mary Magdalene came to the emperor with the news. Since a gift was necessary for such a trip, she took a white egg with her. She told the emperor "Christ is Risen." The Emperor did not believe this news and said that she was as implausible as that the egg turned red. And miraculously the egg immediately acquired a red color.
Version 2.
Hens in Lent carried eggs without stopping. The hosts were afraid that they would spoil. So we decided to paint fresh eggs in red.
Version 3.
When Jesus was a baby, the painted eggs were an entertaining attribute for him.
What eggs to paint for Easter?
At Easter it is customary to paint chicken eggs: neither color nor size is important.
IMPORTANT: For uniform staining, wash the eggs thoroughly with vinegar and soap. Otherwise, the paint will take uneven.
What colors do eggs color for Easter?
Earlier the eggs were painted only in red.
Now for the Easter holiday you can find a wide variety of egg painting options:
- coloring in one color: yellow, green, blue, orange. In fact, the color can be any, what you are closer to the soul
- coloring with several colors: many patterns, drawings
How to paint eggs in red?
Color eggs in traditional red color help:
- Food colorings
- Onion husks
- Beet. Boil the egg with the whole beetroot. Cook until you get the desired color. You can simply grate the boiled egg with beet broth or beets, grated
How to paint eggs with onion husks?
- Take the pan, up to the top filled with onion husks
- Fill with water to the very edge
- Cook for 45 minutes. The cooking time depends on the desired paint color
- Let the infusion cool down
- Put the eggs in the husk cook for 10-15 minutes after boiling
- Cook until you see the desired color
IMPORTANT: Eggs should be completely in water. Turn them to uniform color.
Food colors for Easter eggs
Eggs can be dyed with natural and unnatural food colorings.
FROM unnatural dyes everything is clear: go to the store, buy the food coloring of the desired color, dilute the dye in water, put the egg in the water with the dye until the desired color is obtained.
IMPORTANT: Staining with such dyes usually gives a more even color. But from this there is a feeling of unnaturalness.
FROM natural the color of the matter is more complicated. You can use many natural dyes depending on the desired color of the final egg.
Yellow.
In yellow color will help to color the egg turmeric. Painting technique:
- In 0.5 liters of water, add 2 tablespoons. turmeric, 1 tbsp. table vinegar
- Put the eggs in the water
- Cook until done
Pink color.
Pink color will be given to the eggs by cranberry juice, in which the boiled eggs lie down until the desired color is obtained
Dark brown color.
Boil the eggs in a strong brew of black tea.
Blue colour.
Blue color will help to get red cabbage:
- Finely cut 2 heads of cabbage
- Pour into pan 0.5 l of water
- Add 6 tablespoons water. table vinegar
- Add the cabbage
- Leave it overnight, pre-mix
- In the morning in the infusion, place the boiled eggs until the desired color is obtained
Painting Easter eggs
The painting of eggs will look equally good both on pre-painted eggs and on eggs of natural color.
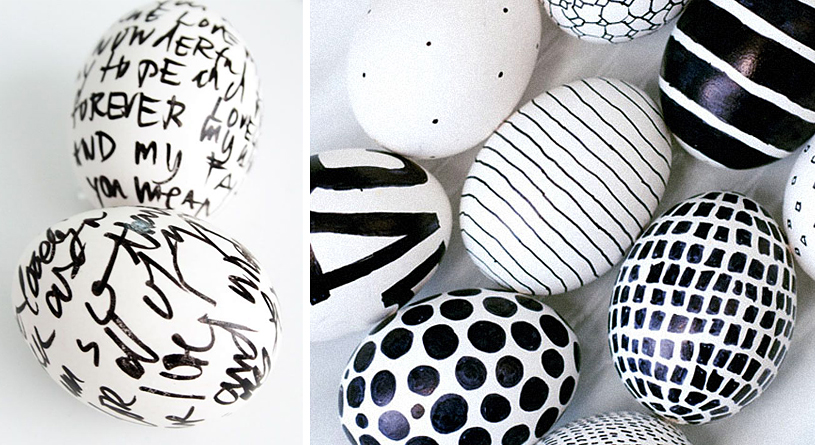
Painting permanent marker.
A simple way of painting Easter eggs for those who can draw.
Painting with paints.
For painting only paint and brush thin. Paints can use the simplest acrylic.
IMPORTANT: This method can decorate an egg with a child and make a painting that you like.
Painting with powdered sugar.
- Prepare the powdered sugar
- Add water to it as much as necessary until a thick, uniform mass is obtained
- Apply the pattern with a pastry syringe with sugar mixture
- Allow the egg to dry
Painting with wax.
- For painting wax you will need wax pencils or wax paints
- Choose the tool you will be painting: needle, needle, awl, copper wire
IMPORTANT: Copper wire will keep the wax hot for a long time, which will make it possible to draw more lines at a time
- Heat the wax to 65 C
- Wet the instrument in the wax and apply the pattern
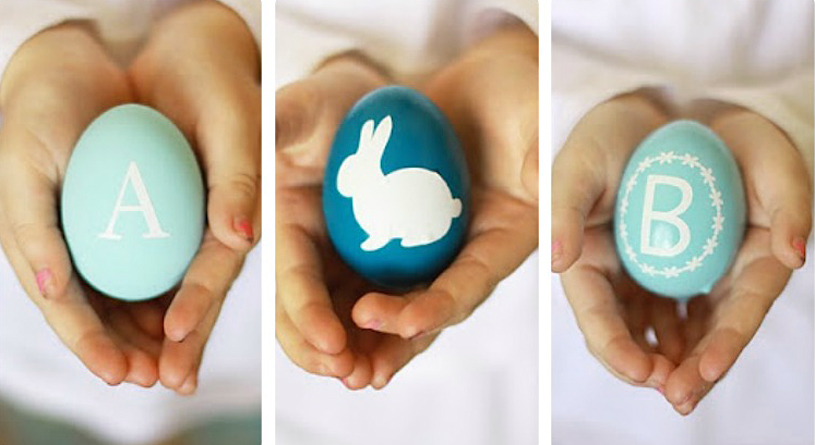
If you do not have the makings of an artist or can not come up with the desired pattern, use stencils.
- Print the stencil
- Select the paints and apply them to a sponge or brush
- Place the stencil on the egg
- Wipe with a sponge or brush using a stencil
- Remove the stencil and dry the egg.
How else can you paint eggs for Easter?
Colored thread mulina.
Wrap the egg completely different colored threads floss and boil the egg hard-boiled.
Beautiful napkins.
- Buy beautiful napkins with a suitable pattern for the holiday
- Cut out the elements you want to transfer to the egg
- Prepare gelatin according to the instructions on the packaging
- Dissolve the pellets of gelatin by heating it
- Apply the cut pattern to the boiled egg
- Brush anointed over the cooked gelatin
- Align the pattern from the center to the edges
Paper.
- From paper cut figurines, stripes, patterns
- Attach paper to the egg to your taste
- Tightly wrap the egg with nylon or gauze
- We lower into the desired dye. If necessary, cook in the dye.
- We wait until the egg is completely dry
- Remove paper
Silk.
- Cut off a piece of silk of the desired color
- Wrap the egg in it
- Over wrap with gauze or nylon and fasten
- Pour water and 3 tablespoons into a saucepan. vinegar
- Cook the wrapped eggs in water with vinegar 20 minutes after boiling
- Wet the egg in rice
- Wrap gauze
- Dip into the dye
- After staining, open the gauze and allow to dry
Marble effect.
The first way.
- Choose two dyes, combined in color (better light and dark)
- In one of them paint an egg
- The second pour into a bowl and pour a few tablespoons. vegetable oil (depends on the volume of water)
- Stir water and oil
- Dip all the time once the egg in the water so as to catch them as much as possible of fatty bubbles on the water
- Blot with a napkin
- Allow to dry